Blog

  • Top Trends in 3D Social Media Icons for Designers

    Top Trends in 3D Social Media Icons for Designers

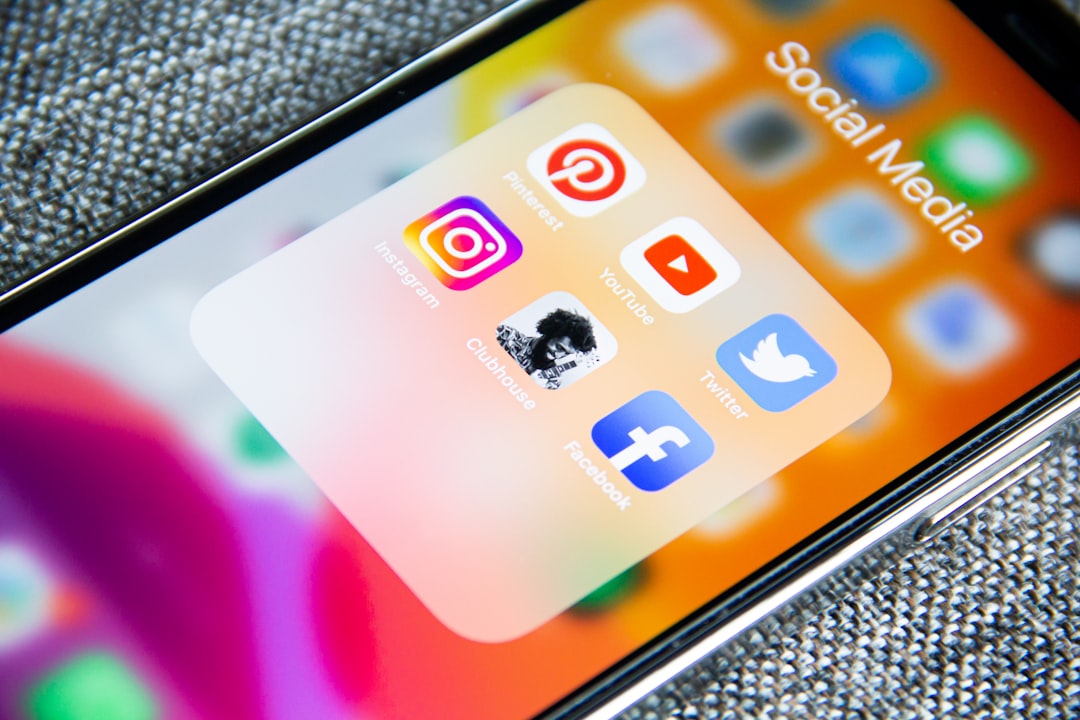
    3D social media icons are having a big moment. They are bright. They are bouncy. They feel like tiny toys living on your screen. For designers, they are a fun way to make apps, websites, pitch decks, and brand kits feel more alive.

    TLDR: 3D social media icons are getting softer, shinier, cleaner, and more playful. Designers are using glass effects, clay styles, bold colors, and tiny animations to make icons stand out. The best icons still stay simple, clear, and easy to recognize. A good 3D icon should feel fun, but it should never confuse the user.

    Why 3D Social Media Icons Are So Popular

    Flat icons are still useful. They are clean and fast. But 3D icons add more feeling. They can look friendly. They can look premium. They can look futuristic.

    People scroll fast. Very fast. A flat icon may get missed. A chunky 3D icon can catch the eye. It can say, “Hey, look over here!” without shouting too much.

    Another reason is simple. Modern screens are better. Colors are richer. Details look sharper. This makes 3D icons more practical than before. Designers can now use texture, shadows, and depth in a smooth way.

    There is also a playful side. Social media is about connection. It is about sharing. It is about quick reactions. A 3D icon feels more touchable. It feels ready to tap.

    1. Soft Clay Icons

    One of the biggest trends is the soft clay look. These icons look like they were made from digital modeling clay. They have smooth corners. They have gentle shadows. They feel warm and handmade.

    This style is great for friendly brands. It works well for education, wellness, creators, kids products, and community platforms. It also makes social media icons feel less corporate.

    The clay style often uses:

    • Rounded shapes
    • Soft shadows
    • Matte surfaces
    • Pastel colors
    • Simple details

    The key is to avoid too much detail. Clay icons should feel simple. If they get too busy, they lose their charm.

    2. Glossy Bubble Icons

    Glossy bubble icons are shiny and fun. They look like candy. Or balloons. Or soft plastic buttons from a toy store.

    This trend uses bright highlights. It uses smooth reflections. It often has a strong light source. The icon looks polished and cheerful.

    Glossy 3D icons are great for bold landing pages. They also work well in app onboarding screens. They can make a dull interface feel exciting.

    But be careful. Too much shine can become noisy. The icon still needs to be readable. The social media logo should stay clear.

    A good glossy icon has:

    • One clear main shape
    • One or two strong highlights
    • Clean shadows
    • High contrast
    • A simple background

    3. Glassmorphism and Clear Icons

    Glassmorphism is still loved by many designers. In 3D social media icons, it creates a clear, frosted, glass-like look. Icons feel light. They feel modern. They feel a little futuristic.

    This style works well with dark backgrounds. It also looks great with colorful gradients behind it. The glass effect bends color and light in a pretty way.

    Clear icons are often used in tech designs. They fit well in dashboards, crypto products, finance apps, AI tools, and premium brand systems.

    To make them work, use strong contrast. A glass icon on a pale background can vanish. Nobody wants to hunt for a social button. Keep the outline visible. Keep the logo readable.

    4. Inflated Puffy Shapes

    Puffy icons look like soft air-filled objects. Think pool toys. Think cushions. Think friendly blobs with a logo on top.

    This trend is playful. It feels casual. It is great for brands that want to feel young and relaxed. It is also useful for social media campaigns, influencer kits, and event pages.

    Puffy icons often use large forms and minimal detail. The main power comes from shape, color, and light. The icon should look like it could bounce across the screen.

    Designers love this style because it feels happy. It makes digital objects look less cold. It adds personality fast.

    5. Miniature Object Icons

    Another fun trend is turning social media icons into tiny objects. A message icon may look like a little mailbox. A video platform icon may sit on a tiny TV screen. A chat icon may become a 3D speech bubble toy.

    This style adds story. It makes the icon feel like part of a mini world. It can be very cute when done well.

    Use this trend for hero sections, illustrations, and campaign graphics. It may not be best for tiny navigation menus. Small icons need to be simple. Mini objects need space to shine.

    6. Bold Gradient Colors

    Gradients are not new. But in 3D icons, they feel fresh again. A smooth gradient can help show depth. It can make the icon look lit from within.

    Popular combinations include:

    • Pink and orange
    • Purple and blue
    • Lime and teal
    • Red and magenta
    • Yellow and peach

    Gradients can make icons feel energetic. They are great for social media because the space is already colorful. A strong gradient can match that mood.

    Still, use them with care. If every icon has too many colors, the set can look messy. Pick a color system. Repeat it. Let the icons feel like a family.

    7. Dark Mode Friendly Icons

    Dark mode is everywhere. Many users prefer it. So designers now create 3D social media icons that look great on dark backgrounds.

    These icons often use glowing edges. They use brighter highlights. They may include soft neon reflections. The shadows are deep, but not muddy.

    A good dark mode icon should feel crisp. It should not melt into the background. The logo shape should still be easy to spot.

    Try these tips:

    • Use a bright rim light
    • Add a soft glow
    • Keep the logo shape bold
    • Avoid black on black
    • Test the icon at small sizes

    8. Clean 3D App Button Sets

    Some 3D icons are wild. Others are calm. Clean 3D app button sets are a more practical trend. These icons look like polished buttons. Each one has the same size, angle, and style.

    This is useful for interface design. It keeps things neat. A set of social icons should not feel random. The user should know that each icon belongs to the same group.

    For a clean set, control the design rules. Use the same corner radius. Use the same shadow direction. Use the same camera angle. This creates harmony.

    Consistency may sound boring. It is not. It is what makes a design feel professional.

    9. Tiny Animated 3D Icons

    Movement is a huge trend. 3D social icons are not just sitting still anymore. They wiggle. They pop. They spin. They bounce when clicked.

    Animation can make a page feel alive. It is perfect for hover effects. It is also great for loading screens, product tours, and social sharing areas.

    But keep movement small. A tiny bounce is charming. A wild spin can be annoying. Users came to do something. Do not distract them too much.

    Good micro animations include:

    • A soft hover lift
    • A small click press
    • A smooth shadow shift
    • A gentle rotation
    • A quick sparkle effect

    The best motion feels natural. It should help the user. It should not steal the show.

    10. Isometric Social Icons

    Isometric design gives icons a fixed 3D angle. It feels tidy and structured. It is perfect for illustrations, maps, dashboards, and tech layouts.

    Isometric social media icons feel more organized than freeform 3D icons. They can show depth without looking too playful. This makes them useful for business brands that still want some visual fun.

    The isometric trend works best in sets. One icon alone can look nice. A whole set can look amazing. It creates a little system that feels smart and balanced.

    11. Mixed 2D and 3D Styles

    Not every icon needs to be fully 3D. A popular trend is mixing flat logos with 3D containers. For example, the logo stays flat and simple. The button behind it becomes soft, shiny, or raised.

    This is a smart approach. It keeps the brand mark readable. It also adds depth without making the icon too complex.

    This style works well for real social platforms because their logos are already familiar. You do not want to redesign them so much that users feel lost.

    12. Retro 3D Icons

    Retro 3D is back. Think early web buttons, jelly shapes, old game menus, and shiny desktop icons. The style feels nostalgic. It is a little silly. That is part of the fun.

    Retro icons often use strong outlines, high gloss, big shadows, and bright colors. They can make a design feel playful and bold.

    This trend is great for music, fashion, gaming, and creator brands. It is not always right for serious industries. But when it fits, it really pops.

    13. Minimal 3D Icons

    Minimal 3D icons are simple, calm, and elegant. They use depth in a quiet way. The shadows are soft. The colors are limited. The details are reduced.

    This trend is strong because many brands want polish without clutter. Minimal 3D gives them that. It feels modern but not loud.

    Use this style when the layout already has lots of content. The icon can add depth without fighting with the text.

    Design Tips for Better 3D Social Icons

    Trends are useful. But good design still needs strong basics. A trendy icon can fail if it is not clear.

    Keep these tips in mind:

    • Start with the silhouette. The shape should be easy to read.
    • Use one main light source. This keeps shadows believable.
    • Test small sizes. Social icons often appear tiny.
    • Match the brand mood. A legal firm may not need candy icons.
    • Build a set. Icons should feel related.
    • Do not overdo texture. Too much detail can look messy.
    • Keep accessibility in mind. Contrast matters.

    Common Mistakes to Avoid

    3D design can be exciting. It can also go wrong fast. Too many effects can make an icon look cheap. Too many colors can hurt the eyes. Too much realism can slow down the design process.

    Here are common mistakes:

    • Using blurry logos
    • Making icons too heavy for the layout
    • Adding random shadows
    • Mixing too many 3D styles
    • Ignoring dark mode
    • Forgetting mobile screens

    Simple is usually better. Make the icon delightful. Then stop. Do not keep adding effects just because you can.

    Where Designers Can Use 3D Social Media Icons

    These icons are useful in many places. They can make a design feel more polished right away.

    Try them in:

    • Website footers
    • Landing page hero sections
    • App onboarding screens
    • Social sharing buttons
    • Creator media kits
    • Presentation slides
    • Email headers
    • Brand guideline pages
    • Marketing banners

    The trick is placement. A 3D icon needs breathing room. Do not squeeze it into a crowded corner. Let it be seen.

    Final Thoughts

    3D social media icons are more than decoration. They help set mood. They make interfaces feel touchable. They can also add joy to a simple page.

    The top trends are soft, shiny, puffy, glassy, animated, and clean. Each one has a different personality. Pick the style that fits the project. Do not chase every trend at once.

    Great 3D icons feel fun. They also stay useful. That is the magic mix. Make them bright. Make them clear. Make them easy to tap. And, most of all, make them feel like they belong.

  • Best CHM Viewer Apps for MacBook and iMac Users

    Best CHM Viewer Apps for MacBook and iMac Users

    Old help files can feel like tiny time capsules. You open one, and boom. You are back in the land of classic Windows manuals, software guides, ebooks, and technical docs. But on a MacBook or iMac, a CHM file does not always open with a friendly smile. You need the right app.

    TLDR: CHM files are Windows help files, but Mac users can open them with the right viewer. The best CHM viewer apps for Mac include CHM Reader Pro, iCHM, Clearview, CHM Viewer, and a few multipurpose readers. Pick a simple app if you only read manuals. Pick a powerful app if you search, bookmark, and manage many files.

    What Is a CHM File?

    A CHM file is a Microsoft Compiled HTML Help file. That sounds fancy. It is really a bundle of web pages packed into one file.

    Many older programs used CHM files for help manuals. Some ebooks also use this format. You may find CHM files in software archives, developer docs, old CD backups, or technical libraries.

    On Windows, CHM files open easily. On macOS, not always. Your Mac may stare at the file like it just saw a pineapple on pizza. That is where a CHM viewer app helps.

    Image not found in postmeta

    What Makes a Good CHM Viewer for Mac?

    A good CHM viewer should make reading easy. It should not make you fight menus. It should not turn your manual into a puzzle.

    Here are the main things to look for:

    • Clean reading view. The text should be easy to read.
    • Fast search. You should find words in seconds.
    • Table of contents support. CHM files often have chapters.
    • Bookmarking. Great for long manuals.
    • Good macOS support. It should work on modern MacBooks and iMacs.
    • Simple controls. Nobody wants a cockpit just to read a help file.

    1. CHM Reader Pro

    CHM Reader Pro is one of the most popular choices for Mac users. It is made for opening CHM files without drama. The design is simple. The app feels like it belongs on a Mac.

    It normally supports the main things you need. You can browse the contents. You can search inside files. You can jump between sections. It is a strong pick if you read technical manuals or software documentation.

    Best for: users who want a dedicated CHM reader.

    Why it is nice:

    • It is focused on CHM files.
    • The layout is clean.
    • Search is useful.
    • It is easy for beginners.

    Possible downside: Some advanced features may depend on the version. Also, app availability can change. Always check the latest details in the Mac App Store before buying.

    2. iCHM

    iCHM has been a trusted name for a long time. It is simple, light, and friendly. If you want a no-fuss CHM viewer, this may be your cup of tea.

    The app usually gives you a nice side panel for contents. You can open files and read them like a normal manual. It may not look as shiny as newer apps, but it gets the job done.

    Best for: people who like simple tools.

    Why it is nice:

    • It is lightweight.
    • It is easy to understand.
    • It handles many CHM files well.
    • It does not try to be everything.

    Possible downside: Some versions may feel a bit old. If you use the latest macOS, check compatibility first. Macs love updates. Old apps do not always love them back.

    3. Clearview

    Clearview is not just for CHM files. It is a document and ebook reader. It can handle several formats, depending on the version. This may include CHM, PDF, EPUB, MOBI, and others.

    This makes Clearview useful if you have a mixed library. Maybe you have a CHM manual, a PDF guide, and an EPUB ebook. With a multipurpose reader, you can keep them in one place.

    Best for: readers with many file types.

    Why it is nice:

    • It supports more than one format.
    • It can help organize documents.
    • It feels more like a reading library.
    • It may save you from installing several apps.

    Possible downside: If you only need CHM support, it may be more app than you need. Like wearing hiking boots to get the mail. Useful, but maybe a lot.

    Image not found in postmeta

    4. CHM Viewer

    Yes, the name is very direct. CHM Viewer apps are common on the Mac App Store. Some are free. Some are paid. Some are simple. Some have extra features.

    When you see an app with a name like this, check the screenshots. Look for a readable layout. Check the reviews. See when it was last updated. A CHM viewer does not need to be fancy, but it should be stable.

    Best for: users who want a quick solution from the App Store.

    Why it is nice:

    • The name tells you what it does.
    • Many versions are easy to use.
    • You can often install quickly.
    • Some offer basic viewing for free.

    Possible downside: There are many similar apps. Quality can vary. Read reviews before you click that shiny download button.

    5. Calibre

    Calibre is famous in the ebook world. It is free, powerful, and a little nerdy. In a good way. It is like a Swiss Army knife for digital books.

    Calibre can manage ebook libraries. It can convert many formats. It may help with CHM files, depending on your needs and the file itself. Some users use it to convert CHM files into more Mac-friendly formats, such as PDF or EPUB.

    Best for: power users and ebook collectors.

    Why it is nice:

    • It is free.
    • It supports many formats.
    • It can organize big libraries.
    • It has conversion tools.

    Possible downside: It can feel busy at first. There are many buttons. Do not panic. Start with opening one file. Then explore slowly.

    6. KchmViewer Through Mac Ports or Homebrew

    KchmViewer is known in the Linux world. Some Mac users install it through tools like Homebrew or MacPorts. This is not the easiest path. But it can work well for people who like command line tools.

    If the word terminal makes you smile, this option may be fun. If it makes you sweat, skip it. There are easier choices.

    Best for: technical users and developers.

    Why it is nice:

    • It is a serious CHM reader.
    • It may handle complex CHM files well.
    • It appeals to open source fans.
    • It is good for people already using Homebrew.

    Possible downside: Setup can be harder. It is not the best first choice for casual users.

    7. Web Browser Extraction Tools

    Some users do not want a viewer at all. They want to extract the CHM file. Then they read the HTML pages in a browser like Safari, Chrome, or Firefox.

    This can be useful if a CHM file is old or strange. By extracting it, you turn the packed file into folders and pages. Then you can browse the content like a tiny website.

    Best for: people who want direct access to the contents.

    Why it is nice:

    • You can use your normal browser.
    • You can save or move individual pages.
    • It is helpful for broken CHM files.
    • Developers may like it.

    Possible downside: It is not as neat as using a viewer. You may get lots of files and folders. It can look messy fast.

    Free vs Paid CHM Viewers

    Free apps are great. Your wallet will clap. But paid apps often have better polish, faster support, and nicer design.

    Choose a free CHM viewer if:

    • You only open CHM files once in a while.
    • You do not need bookmarks.
    • You are fine with basic search.
    • You enjoy testing different apps.

    Choose a paid CHM viewer if:

    • You read CHM files often.
    • You need reliable search.
    • You want a smooth Mac-style interface.
    • You use CHM files for work or study.

    Think of it like coffee. Free coffee is nice. But if you drink it every day, you may want the good stuff.

    Best App for Different Mac Users

    Not every Mac user needs the same app. A student is not the same as a developer. A casual reader is not the same as a documentation wizard.

    Here is a quick guide:

    • Best for beginners: CHM Reader Pro or a simple CHM Viewer app.
    • Best for old manuals: iCHM.
    • Best for ebook fans: Clearview or Calibre.
    • Best for developers: KchmViewer or Calibre.
    • Best for quick reading: Any clean App Store CHM viewer with good reviews.
    Image not found in postmeta

    Tips for Opening CHM Files Safely

    CHM files are old, but they can still contain active content. Be careful with files from unknown websites. A help file should not feel shady. If it does, trust your gut.

    Use these simple safety tips:

    • Download from trusted sources. Avoid random file dumps.
    • Scan suspicious files. Use security software if needed.
    • Keep your Mac updated. Updates fix security holes.
    • Do not open unknown links inside files. Be calm and curious, not reckless.
    • Back up important files. Time Machine is your friend.

    What If the CHM File Looks Broken?

    Sometimes a CHM file opens, but the pages look blank. Or the menu is missing. Or search acts like it is on vacation.

    Try these fixes:

    1. Open it with another viewer. Some apps handle files better than others.
    2. Rename the file. Use simple letters and numbers. Avoid strange symbols.
    3. Move it to a local folder. Do not open it from a cloud folder first.
    4. Check if the file is damaged. Download it again if possible.
    5. Extract the contents. Then read the HTML files in a browser.

    CHM files can be picky. Treat them gently. Like a cat with a tiny software manual.

    Which CHM Viewer Should You Choose?

    If you want the simplest answer, start with CHM Reader Pro or a well-reviewed CHM Viewer from the Mac App Store. They are easy and direct. They are good for most people.

    If you like older lightweight apps, try iCHM. If you have many ebook formats, try Clearview or Calibre. If you are technical and enjoy tinkering, look at KchmViewer.

    The best app is the one that opens your file fast and lets you read without fuss. That is the whole goal. No fireworks needed. Just readable text, a useful search box, and maybe a bookmark or two.

    Final Thoughts

    CHM files may be old, but they are not useless. Many of them hold valuable guides, developer notes, and classic software manuals. With the right Mac app, they become easy to read again.

    Your MacBook or iMac is more than ready. It just needs a little helper. Pick a viewer that matches your style. Keep it simple. Then open that CHM file and enjoy the strange little joy of finding exactly the help page you needed.

    Best overall pick: CHM Reader Pro or a trusted CHM Viewer app. Best free power option: Calibre. Best simple classic choice: iCHM. And best mood? The one where your file finally opens.

  • Top Trending Instagram Hashtags for Reels and Posts

    Top Trending Instagram Hashtags for Reels and Posts

    Instagram hashtags remain a practical discovery tool for creators, brands, educators, and small businesses, especially when they are used with clear content strategy rather than copied in bulk. While the platform’s recommendation system now relies heavily on watch time, saves, shares, captions, keywords, and user behavior, hashtags still help categorize content and provide context for both Reels and traditional feed posts. The most effective approach is to combine broad trending hashtags with niche, audience-specific tags that accurately describe the content.

    TLDR: The best Instagram hashtags for Reels and posts are relevant, specific, and balanced between popular and niche categories. Do not rely only on massive hashtags such as #viral or #love; pair them with targeted tags related to your industry, format, location, or audience. For Reels, prioritize discovery-focused hashtags connected to entertainment, education, trends, and short-form video. For posts, use hashtags that support context, community, product visibility, and long-term searchability.

    Why Instagram Hashtags Still Matter

    Hashtags are no longer a shortcut to instant reach, but they are still useful when applied with discipline. Instagram uses them as one of many signals to understand what a post is about. A hashtag can place your content in front of people browsing a topic, following a niche, or engaging with similar creators. This is particularly important for accounts that are still building authority and do not yet have large audiences.

    The key is to avoid treating hashtags as a magic formula. A strong Reel with poor retention will not perform well simply because it includes trending tags. Likewise, a high-quality carousel post may underperform if the hashtags are too generic or unrelated. Hashtag relevance is more important than hashtag volume. If a tag does not match the actual content, it may attract the wrong audience or reduce engagement quality.

    Image not found in postmeta

    Best Trending Instagram Hashtags for Reels

    Reels are designed for fast discovery. The best hashtags for Reels typically relate to short-form video, entertainment, education, transformation, trends, or community participation. These tags should support the content’s theme and help Instagram understand whether the Reel is funny, instructional, inspirational, or product-focused.

    • #reels
    • #instagramreels
    • #reelsinstagram
    • #reelitfeelit
    • #viralreels
    • #trendingreels
    • #reelstrending
    • #explorepage
    • #instareels
    • #shortvideo

    These hashtags are broad and highly competitive. They can be useful, but they should rarely be the only tags you use. A stronger Reel hashtag set might combine two or three broad tags with several niche tags. For example, a fitness coach posting a workout Reel could use #reels, #fitnessreels, #homeworkout, #strengthtraining, and #beginnerfitness. This combination is more informative than simply using the biggest trending tags available.

    Trending Hashtags for General Instagram Posts

    Feed posts, including photos, graphics, and carousels, often benefit from hashtags that describe the subject and audience more precisely. Posts may have a longer useful life than Reels, especially if they are educational, searchable, or saved by users. Hashtags for posts should therefore focus on clarity and long-term relevance.

    • #instagood
    • #photooftheday
    • #picoftheday
    • #instadaily
    • #explore
    • #lifestyle
    • #inspiration
    • #motivation
    • #creative
    • #community

    These general tags can support visibility, but they are often saturated. For serious growth, pair them with category-specific hashtags. A photographer might use #portraitphotography, #weddingphotographer, or #streetphotography. A bakery might use #customcakes, #homebakery, or #desserttable. The more accurately the hashtag reflects the post, the better the chance of reaching people who actually care about it.

    Top Hashtags for Business and Marketing Content

    Business and marketing accounts should be especially careful with hashtag selection. Professional audiences are less likely to respond to exaggerated or unrelated tags. A serious brand should use hashtags that signal expertise, industry, and value.

    • #smallbusiness
    • #entrepreneur
    • #businessowner
    • #digitalmarketing
    • #contentmarketing
    • #socialmediamarketing
    • #branding
    • #marketingtips
    • #businesstips
    • #startup

    For business posts, the strongest hashtag strategy usually includes a mix of industry hashtags, audience hashtags, and content format hashtags. For example, a consultant sharing a carousel about pricing strategy could use #consultingbusiness, #pricingstrategy, #smallbusinesstips, #businessgrowth, and #carouselpost. This gives Instagram and users a clear understanding of the post’s relevance.

    Image not found in postmeta

    Top Hashtags for Fashion, Beauty, and Lifestyle

    Fashion, beauty, and lifestyle content performs well on Instagram because it is visual, aspirational, and easy to consume. However, these categories are also extremely competitive. Creators should avoid depending only on broad hashtags and instead use tags connected to style type, product category, season, or audience.

    • #fashion
    • #style
    • #ootd
    • #fashionblogger
    • #skincare
    • #beautytips
    • #makeupideas
    • #lifestyleblogger
    • #selfcare
    • #wellness

    A better strategy is to refine these hashtags based on the specific post. A skincare Reel about sensitive skin might use #sensitiveskincare, #skincareroutine, and #dermatologytips. A fashion post featuring office outfits might include #workwearstyle, #capsulewardrobe, and #minimalstyle. This approach reduces wasted impressions and increases the likelihood of meaningful engagement.

    Top Hashtags for Fitness, Health, and Wellness

    Fitness and wellness hashtags can generate strong engagement, but accuracy is crucial. Health-related content should avoid misleading claims and should use hashtags responsibly. Posts that provide workouts, habits, meals, or mindset guidance should make clear whether they are educational, personal, or professional in nature.

    • #fitness
    • #workout
    • #fitlife
    • #homeworkout
    • #strengthtraining
    • #healthylifestyle
    • #wellnesstips
    • #nutrition
    • #mindfulness
    • #selfcaretips

    For Reels, fitness creators often benefit from hashtags that match the movement or goal: #legdayworkout, #mobilitytraining, #coreworkout, or #beginnerworkout. For feed posts, educational hashtags such as #fitnesseducation, #habitbuilding, or #wellnessjourney can improve clarity and attract a more committed audience.

    Top Hashtags for Travel and Food Content

    Travel and food are two of Instagram’s most visually powerful categories. The best hashtags here often include location, cuisine, experience type, or travel style. A generic hashtag like #travel may be too broad by itself, while a location-specific tag can bring in people actively researching a destination.

    • #travel
    • #travelgram
    • #wanderlust
    • #traveltips
    • #foodie
    • #foodphotography
    • #restaurantreview
    • #homecooking
    • #easyrecipes
    • #streetfood

    Location tags are especially valuable. A café in Chicago, for example, should not rely only on #coffee or #foodie. It should consider tags like #chicagocoffee, #chicagoeats, or #chicagocafe. A travel creator posting about Rome could pair #travelreels with #romeitaly, #italytravel, and #rometravelguide.

    Image not found in postmeta

    How Many Hashtags Should You Use?

    Instagram allows up to 30 hashtags on a feed post, but using all 30 is not always necessary. For many accounts, 5 to 15 well-selected hashtags are more effective than a long list of loosely related tags. Reels may perform well with fewer hashtags when the caption, topic, audio, and engagement signals are strong.

    A practical structure is:

    • 2 to 3 broad hashtags with high search volume.
    • 3 to 5 niche hashtags that describe the exact subject.
    • 1 to 3 audience hashtags connected to the people you want to reach.
    • 1 to 2 location hashtags if geography matters.
    • 1 branded hashtag if you have a campaign, community, or business identity.

    This balanced method avoids both extremes: using only massive trending hashtags or using obscure tags that no one searches. The goal is not to appear everywhere. The goal is to appear in the right places.

    Hashtags to Use With Caution

    Some hashtags are popular but not always useful. Tags such as #viral, #followforfollow, #likeforlike, and #explorepage may attract low-quality engagement or bots. They can also make a business account appear less professional. While these hashtags are not automatically harmful in every context, they should be used sparingly and only if they genuinely fit the content strategy.

    It is also wise to check hashtags before using them. Some tags may be restricted, overrun with spam, or associated with content that does not match your brand. A serious account should review the hashtag page, look at recent posts, and confirm that the tag aligns with its audience and reputation.

    How to Build a Reliable Hashtag Strategy

    A dependable hashtag strategy is based on testing, not guessing. Start by creating several hashtag groups for each content category you publish. For example, a small business might create separate groups for product launches, behind-the-scenes posts, customer education, testimonials, and Reels. Track which groups produce impressions, profile visits, saves, and follows.

    Instagram Insights can help identify whether hashtags are contributing to reach, but they should not be evaluated in isolation. If a post performs well, consider the hook, visual quality, caption, posting time, and audience interest. Hashtags are only one part of the system.

    Review your hashtags every month. Trends change, audience behavior shifts, and some tags become less effective over time. Remove tags that consistently fail to attract relevant engagement. Add new tags when your content direction, market, or audience changes.

    Final Recommendations

    The top trending Instagram hashtags for Reels and posts are useful only when they support content that people want to watch, save, share, or discuss. Broad hashtags can help categorize your content, but niche hashtags usually create better audience alignment. For Reels, prioritize tags that describe the format, topic, and viewer interest. For posts, use hashtags that improve context, searchability, and community connection.

    Ultimately, the best hashtag strategy is serious, consistent, and evidence-based. Use trending hashtags carefully, combine them with precise niche terms, and review performance regularly. When hashtags are treated as a supporting tool rather than a growth guarantee, they become a reliable part of a stronger Instagram content strategy.

  • What Does “An Error Occurred While Preparing the Installation” Mean on macOS Sierra?

    What Does “An Error Occurred While Preparing the Installation” Mean on macOS Sierra?

    Seeing the message “An error occurred while preparing the installation” during a macOS Sierra install can be alarming, especially if the Mac appears to be stuck or unable to boot normally. This error usually appears when the installer cannot verify, prepare, or continue the installation process. Although it sounds vague, it most often points to problems with the system date and time, the installer file, the startup disk, or the network connection used during installation.

    TLDR: On macOS Sierra, “An error occurred while preparing the installation” generally means the installer cannot safely proceed. The most common cause is an incorrect system date, especially when installing from Recovery Mode or an old USB installer. Other possible causes include a damaged installer, disk errors, insufficient space, or a failed internet recovery connection. In many cases, correcting the date in Terminal, checking the disk, and reinstalling with a fresh installer resolves the issue.

    What the Error Means

    The message “An error occurred while preparing the installation” is a general installer failure warning. It does not always identify the exact problem, but it indicates that macOS Sierra cannot complete one of the required checks before installation begins or continues.

    Before macOS installs, the system verifies several things: the installer certificate, the target disk, available storage, system compatibility, and sometimes Apple’s servers. If one of these checks fails, the installation may stop before any major changes are made.

    This error is especially common when installing macOS Sierra on older Macs, when using an old downloaded installer, or when reinstalling macOS from Recovery Mode after the Mac has been unused for a long time.

    Image not found in postmeta

    Why This Happens on macOS Sierra

    macOS Sierra was released in 2016, and many installation problems today are related to age. Older installers may contain expired certificates, and older Macs may have batteries that no longer preserve the correct system clock. When the Mac’s date is wrong, the installer can fail validation even if everything else appears normal.

    The error may also occur if the installer application is incomplete, the startup disk has corruption, or the Mac cannot communicate properly with Apple’s servers. Because the message is broad, the best approach is to work through the most likely causes in a careful order.

    Common Causes of the Error

    The following are the most frequent reasons this message appears during a macOS Sierra installation:

    • Incorrect date and time: The Mac’s system clock may be set to a date far in the past or future.
    • Expired installer certificate: An old Sierra installer may no longer pass certificate verification.
    • Damaged installer: The installer file may be incomplete or corrupted.
    • Disk problems: The internal drive may have file system errors or hardware issues.
    • Insufficient storage: The selected volume may not have enough free space.
    • Network failure: Internet Recovery or online verification may fail due to poor connectivity.
    • Unsupported Mac model: The Mac may not officially support macOS Sierra.

    The Most Common Fix: Correct the Date and Time

    The first thing to check is the Mac’s date and time. An incorrect date is one of the most common causes of this error, particularly when reinstalling from Recovery Mode.

    To correct the date from macOS Recovery:

    1. Restart the Mac.
    2. Hold Command + R during startup to enter macOS Recovery.
    3. When the Recovery screen appears, open Utilities from the menu bar.
    4. Select Terminal.
    5. Type date and press Return to view the current system date.

    If the displayed date is obviously wrong, set it manually. The date command uses the following format:

    date mmddHHMMyy

    That means month, day, hour, minute, year. For example, to set the date to March 15, 2024 at 10:30 AM, you would type:

    date 0315103024

    After entering the command, press Return, close Terminal, and try the installation again.

    Important: If you are using an older Sierra installer with an expired certificate, setting the date to a time close to when the installer was valid may sometimes allow it to run. However, the better long-term solution is to use a fresh installer from a reliable Apple source whenever possible.

    Check the Startup Disk with Disk Utility

    If the date is correct and the error continues, the next step is to check the disk. macOS needs a healthy file system to prepare the installation. If the drive has directory errors, damaged permissions, or failing sectors, the installation may not continue.

    To check the disk:

    1. Start the Mac in macOS Recovery by holding Command + R at startup.
    2. Choose Disk Utility.
    3. Select the internal drive or the target installation volume.
    4. Click First Aid.
    5. Allow Disk Utility to scan and repair errors.

    If Disk Utility reports that the disk was repaired, try the installation again. If it says the disk cannot be repaired, back up any important data if possible and consider replacing the drive or erasing it before reinstalling macOS.

    Image not found in postmeta

    Make Sure There Is Enough Free Space

    macOS Sierra requires enough free space not only for the operating system itself but also for temporary installation files. If the disk is nearly full, the installer may fail during preparation.

    As a practical rule, you should have at least 15 to 20 GB of free space before attempting the installation. More is better, especially if you are upgrading from an older macOS version rather than performing a clean install.

    If you can still boot into macOS, remove unnecessary files, empty the Trash, and move large files to an external drive. If you cannot boot normally, you may need to access the disk from Target Disk Mode, an external bootable system, or Recovery tools.

    Use a Fresh macOS Sierra Installer

    If you are installing Sierra from a USB drive or an old copy of the installer, the installer itself may be the problem. Old macOS installers are known to fail when their certificates expire or when the download was incomplete.

    A damaged installer may launch successfully but fail when it begins preparing files. This can make the issue look like a disk or hardware problem when the actual cause is the installation package.

    To reduce the risk:

    • Use a newly downloaded installer whenever possible.
    • Avoid installers from unofficial websites or file sharing sources.
    • Create a new bootable USB installer if the current one repeatedly fails.
    • Use a reliable USB drive with enough capacity and no known errors.

    If your Mac supports a newer version of macOS, consider installing a later compatible version instead of Sierra. Newer installers may handle certificates, recovery, and server communication more reliably.

    Check Your Internet Connection

    If you are using Internet Recovery, the Mac depends on Apple’s servers to download installation files. A weak Wi Fi signal, captive portal, firewall, or interrupted connection can cause the installer to stop with a preparation error.

    For best results, connect to a stable network. If possible, use Ethernet instead of Wi Fi. Avoid public hotel, school, or office networks that require web based sign in, because Recovery Mode may not handle those login pages properly.

    You can also restart the router, move the Mac closer to the access point, or try another network. If the error changes or the download progresses further on a different connection, the original network was likely part of the problem.

    Confirm That the Mac Supports macOS Sierra

    Not every Mac can run macOS Sierra. If you are attempting to install it on unsupported hardware, the installation may fail or refuse to continue.

    In general, macOS Sierra supports many Macs from late 2009 and later, depending on the model. Before spending time troubleshooting, confirm that the Mac is compatible with Sierra. You can check the Mac model from About This Mac if macOS still boots, or by identifying the model number printed on the device and comparing it with Apple’s compatibility information.

    If the Mac is unsupported, the proper fix is not to force the installer. Instead, install the newest officially supported macOS version for that machine.

    Consider a Clean Installation

    If you have already checked the date, disk, installer, and network, but the error still appears, a clean installation may be necessary. A clean install erases the target drive and installs macOS on a blank volume. This can resolve problems caused by damaged system files, failed previous upgrades, or severe file system issues.

    Warning: Erasing the disk will delete the data on it. Before doing this, make sure you have a complete backup. If important files are not backed up, consider professional data recovery or connecting the Mac to another computer before erasing anything.

    To perform a clean install:

    1. Boot into macOS Recovery.
    2. Open Disk Utility.
    3. Select the internal drive or target volume.
    4. Erase it using a suitable format, commonly Mac OS Extended Journaled for Sierra.
    5. Close Disk Utility.
    6. Select Reinstall macOS and follow the prompts.
    Image not found in postmeta

    When Hardware May Be the Real Problem

    Although the error is usually software related, hardware can also be involved. Older Macs that run Sierra may have aging hard drives, failing SSDs, unstable RAM, or depleted PRAM batteries. These problems can interrupt installation or prevent the Mac from keeping accurate time.

    Signs of possible hardware failure include repeated installation failures at different stages, unusual clicking noises from a hard drive, Disk Utility reporting unrepairable errors, frequent freezes, or the Mac failing to detect the internal drive.

    If you suspect hardware failure, run Apple Diagnostics if available. Restart the Mac and hold the D key during startup. Follow the on screen instructions and note any reference codes. For older machines, professional inspection may be the safest option.

    What Not to Do

    When facing an installation error, it is tempting to repeat the same steps many times or download installers from random sources. That can create more risk, especially if the Mac contains important data.

    • Do not erase the disk unless you have a backup or are certain the data is no longer needed.
    • Do not use unofficial installers from unknown websites.
    • Do not ignore disk warnings reported by Disk Utility.
    • Do not assume the Mac is permanently broken before checking the date and installer.

    Final Thoughts

    The message “An error occurred while preparing the installation” on macOS Sierra means the installer cannot complete the checks or setup steps required to continue. In many cases, the cause is simple: the Mac’s date and time are wrong, or the installer is too old to validate properly.

    A careful troubleshooting process is the best response. Start by checking the date in Terminal, then verify the disk with Disk Utility, confirm available storage, use a fresh installer, and test the network connection if Recovery is involved. If those steps fail, a clean installation or hardware diagnosis may be necessary.

    Handled methodically, this error is often recoverable. The key is to protect your data first, avoid untrusted installation sources, and treat repeated failures as a sign that the disk, installer, or hardware needs closer attention.

  • Best Instagram Profile Viewer Apps for Public Account Browsing (2026)

    Best Instagram Profile Viewer Apps for Public Account Browsing (2026)

    Instagram is still the place where people peek at trends, outfits, food spots, travel ideas, memes, creators, and tiny dogs wearing sunglasses. In 2026, many users want simple ways to browse public Instagram profiles without getting lost in the app. That is where profile viewer apps and web tools come in. They can help you view public posts, check bios, scan highlights, and explore content in a cleaner way.

    TLDR: The best Instagram profile viewer apps in 2026 are the ones that keep things simple, safe, and limited to public accounts only. Good options include Instagram’s own app, web viewers, social media analytics tools, and creator research platforms. Avoid any tool that asks for your Instagram password or promises private account access. That is a giant red flag with flashing lights.

    What Is an Instagram Profile Viewer App?

    An Instagram profile viewer app is a tool that helps you look at Instagram profiles in a different way. Some are mobile apps. Some are websites. Some are browser tools. Some are part of bigger marketing platforms.

    The goal is simple. You enter a username. The tool shows public profile details. This can include profile photos, bios, public posts, reels, tagged content, follower counts, and sometimes basic engagement stats.

    But here is the golden rule. A real, safe viewer works only with public information. It should not unlock private profiles. It should not ask for secret login details. It should not make weird promises like “view anyone secretly forever.” That sounds fun in a cartoon villain way. But in real life, it is usually unsafe.

    Image not found in postmeta

    Why Use a Public Profile Viewer?

    People use these tools for many normal reasons. Not every viewer is a spy movie character in a hoodie. Most users just want a faster or cleaner way to browse.

    • Trend research: See what creators are posting in your niche.
    • Influencer discovery: Check public profiles before reaching out.
    • Brand monitoring: Look at public mentions and tagged posts.
    • Travel planning: Browse public hotel, cafe, and city accounts.
    • Content inspiration: Study layouts, captions, and visual styles.
    • Light browsing: View public profiles without opening the full app every time.

    It is like window shopping. You can look at what is publicly displayed. But you should not try to sneak into the stockroom.

    Quick Safety Rules Before You Try Any Viewer

    Before we talk about the best types of Instagram profile viewer apps, let’s set some safety rules. They are simple. They matter a lot.

    • Never enter your Instagram password into a random viewer tool.
    • Never pay for private account access. That is not a real feature.
    • Do not download unknown APK files from sketchy sites.
    • Check reviews before installing anything.
    • Use tools that focus on public data and clear features.
    • Respect creators. Public does not mean free to steal.

    If a tool looks too magical, it may be a trap with a cute logo.

    1. Instagram’s Own App and Website

    Let’s start with the obvious one. The official Instagram app is still the safest profile viewer. It is not fancy. It does not pretend to be a secret agent. But it works.

    You can view public profiles, posts, reels, stories, highlights, comments, and tagged photos. You can also search by username, hashtag, location, or audio. In 2026, Instagram’s built-in search is better than it used to be. It is still a little messy. But it gives you the most accurate version of a profile.

    Best for: Everyday browsing, public stories, reels, comments, and direct engagement.

    Why it is good: It is official. It is safe. It shows real-time content.

    Downside: You may need to log in. The app can also be distracting. You open it to check one profile. Thirty minutes later, you are watching a raccoon eat grapes.

    2. Instagram Web Browser View

    The Instagram website is a great basic viewer. You can type a public profile URL into your browser. For example, instagram.com/username. This is useful if you are on a laptop or tablet.

    It is simple. It does not require a third-party app. It works well for browsing public posts and reading bios. It is also helpful for people who do not want to install another app on their phone.

    Best for: Desktop browsing, simple profile checks, and quick research.

    Why it is good: No extra software. No weird permissions. Easy to use.

    Downside: Some features may require login. Stories and deeper browsing can be limited.

    3. Public Web Viewer Tools

    Public web viewer tools are websites that display public Instagram profile content in a cleaner layout. These tools often focus on speed. You enter a username. The site loads public posts and profile info.

    Some tools also let you view public reels or search profiles without opening the Instagram app. Their names and popularity change often. That is normal. Instagram updates its systems. Tools appear. Tools disappear. It is a tiny tech jungle.

    Best for: Fast public profile checks and casual browsing.

    Why they are good: They can be quick. They may have cleaner pages. Some work without login.

    Downside: Quality varies a lot. Some are full of ads. Some stop working without warning. Some may be unsafe.

    Use these with care. Choose tools with clear policies. Avoid anything that asks for your password. Also avoid popup storms. If a website has seven buttons saying “Download Now,” back away slowly.

    Image not found in postmeta

    4. Social Media Analytics Platforms

    Analytics platforms are more serious. They are made for brands, creators, agencies, and marketers. Instead of just showing a profile, they help you understand public performance.

    These tools may show engagement rates, posting frequency, top posts, audience clues, hashtag data, and growth patterns. They are useful if you want to study public accounts for business reasons.

    Best for: Influencer research, brand campaigns, competitor checks, and content planning.

    Why they are good: They give useful numbers. They save time. They help you compare accounts.

    Downside: Many are paid. Some only work well with business accounts or connected profiles.

    If you run a brand, this category is often better than a basic viewer. You get more than “nice photos.” You get clues. You can see what content is working. You can spot patterns. You can make smarter plans.

    5. Influencer Discovery Tools

    Influencer discovery tools are profile viewers with superpowers. They help you find creators based on niche, location, audience size, engagement, and content type.

    For example, a fitness brand may search for public fitness creators in Chicago. A skincare company may look for beauty creators with strong reel engagement. A travel company may search for creators who post about hiking, hotels, or beach trips.

    Best for: Finding creators to partner with.

    Why they are good: They save hours of manual searching. They show useful public data in one place.

    Downside: Most good ones cost money. Data may not always be perfect.

    These tools are not for snooping. They are for research. Think of them as a smart phonebook for public creators.

    6. Story Viewer Tools for Public Accounts

    Some tools focus on public Instagram stories. They let you view stories from public accounts through a browser interface. This can be useful for trend watching, event coverage, or checking how brands use short-form updates.

    But this category needs extra caution. Many “anonymous story viewer” tools are stuffed with ads or misleading promises. Some are fine. Some are not. Keep your guard up.

    Best for: Viewing public stories from public accounts.

    Why they are good: They can be quick and simple.

    Downside: Many are unreliable. Some disappear. Some may not respect privacy expectations.

    If a story is from a private account, leave it alone. If a tool says it can break that wall, close it. Then maybe make tea. Tea makes better choices.

    7. Browser Extensions

    Browser extensions can add handy features to Instagram browsing. Some help organize saved posts. Some improve desktop viewing. Some add download buttons for your own content. Some help with workflow.

    But extensions can also be risky. They may see pages you visit. They may collect data. They may ask for permissions they do not need.

    Best for: Power users who browse public profiles often on desktop.

    Why they are good: They can make Instagram easier to use on a computer.

    Downside: Permissions can be scary. Bad extensions can harm privacy.

    Install only trusted extensions from official browser stores. Read reviews. Check update history. Remove anything you no longer use.

    Features to Look For in 2026

    The best Instagram profile viewer apps in 2026 should be simple, fast, and respectful. Fancy design is nice. But safety matters more.

    • No password required: This is the biggest green flag.
    • Public account support only: Clear and honest tools are better.
    • Clean layout: Easy browsing without messy ads.
    • Mobile friendly: It should work well on phones.
    • Search tools: Username, hashtag, and niche search are helpful.
    • Analytics: Great for brands and creators.
    • Clear privacy policy: You should know what data is collected.
    • No fake promises: Avoid “unlock private profiles” claims.

    What to Avoid

    Some profile viewer apps are not your friend. They are more like glitter-covered trouble. They look exciting. Then they ask for your login, payment details, or app permissions.

    Stay away from tools that offer:

    • Private profile viewing.
    • Hidden follower lists.
    • Secret message access.
    • Instagram password requests.
    • Suspicious downloads.
    • Too many popups.
    • Fake countdown timers.
    • “Human verification” loops.

    These are usually scams, data grabs, or malware risks. Your curiosity is not worth your account.

    Image not found in postmeta

    Best Choice by User Type

    Not everyone needs the same viewer. Here is a simple cheat sheet.

    • Casual users: Use Instagram’s app or website.
    • Desktop browsers: Use Instagram web or a trusted web viewer.
    • Small businesses: Use analytics tools with public profile insights.
    • Agencies: Use influencer discovery platforms.
    • Creators: Use tools that compare public content performance.
    • Trend hunters: Use search tools for hashtags, reels, and locations.

    The “best” app is not always the fanciest one. It is the one that does your job safely.

    Are Instagram Profile Viewer Apps Legal?

    In general, viewing public Instagram content is normal. Public means people can see it. But that does not mean you can copy, scrape, repost, or reuse everything without permission.

    You should also respect Instagram’s rules and local laws. Some tools may violate platform terms. Some may collect data in ways that are not okay. If you are using a viewer for business, be extra careful.

    A smart rule is this: look, learn, and respect. Do not steal content. Do not harass people. Do not try to bypass privacy settings.

    Final Verdict

    The best Instagram profile viewer apps for public account browsing in 2026 are safe, simple, and honest. The official Instagram app and website are still the safest starting points. Public web viewers can be useful for quick checks. Analytics and influencer tools are better for business research.

    Just remember the magic rule. If it is public, you can browse it respectfully. If it is private, hands off. No app should promise to break that barrier.

    So go explore public profiles. Find fashion ideas. Study creators. Check travel spots. Laugh at meme pages. Just keep your password safe, your clicks careful, and your online manners shiny.

  • How Do You Troubleshoot CrossOver Installation and Driver Problems on macOS?

    How Do You Troubleshoot CrossOver Installation and Driver Problems on macOS?

    Installing Windows applications on macOS with CrossOver can be remarkably convenient, but problems can still occur during installation, bottle setup, graphics initialization, or driver detection. A careful troubleshooting process helps separate CrossOver issues from macOS permissions, corrupted installers, outdated components, or application-specific limitations.

    TLDR: Start by confirming that your macOS version, CrossOver version, and target application are compatible. Then check security permissions, reinstall or repair the affected bottle, and update graphics-related components where appropriate. If the problem involves drivers, remember that CrossOver does not install Windows kernel drivers in the same way Windows does, so some hardware-dependent software may not work. Keep backups of working bottles and collect logs before contacting support.

    Understanding What CrossOver Can and Cannot Do

    CrossOver is based on Wine technology and allows many Windows applications to run on macOS without a full Windows virtual machine. It translates Windows API calls into macOS-compatible behavior. This is powerful, but it also means CrossOver is not a complete Windows operating system.

    This distinction is especially important when troubleshooting driver problems. Many Windows applications install user-level components, runtime libraries, registry entries, and configuration files. CrossOver can often handle these. However, software that depends on Windows kernel-level drivers, low-level USB device control, anti-cheat systems, copy protection drivers, or specialized hardware services may fail or behave unpredictably.

    Before spending hours troubleshooting, verify whether the application is known to work with CrossOver. CodeWeavers maintains compatibility information, and user reports can help you determine whether the problem is likely fixable or caused by a fundamental incompatibility.

    Confirm macOS and CrossOver Compatibility

    The first step is to confirm that your environment is supported. Older CrossOver versions may not work correctly on newer macOS releases, while older macOS versions may lack frameworks required by current CrossOver builds.

    • Check your macOS version: Open Apple menu > About This Mac and confirm the installed version.
    • Update CrossOver: Use the latest stable version available for your license whenever possible.
    • Check Apple Silicon support: If you use an M1, M2, M3, or newer Mac, confirm that the application can run under CrossOver on Apple Silicon.
    • Review application requirements: Some Windows programs require specific DirectX, .NET, Visual C++, or driver components.

    If CrossOver itself fails to launch, reinstall it from a fresh download. Drag the app to the Applications folder rather than running it from the Downloads folder or disk image. This avoids permission and path issues that can interfere with bottle creation and application installation.

    Image not found in postmeta

    Check macOS Security and Privacy Settings

    macOS security controls can block parts of an installation or prevent CrossOver from accessing files, removable drives, or network locations. If an installer starts and then silently fails, permissions should be one of the first things you check.

    Go to System Settings > Privacy & Security and review whether macOS has blocked any recently opened application or component. You may see a message allowing you to approve CrossOver or a related helper process. Also consider granting CrossOver access to folders needed by the installer, especially if setup files are stored in Documents, Desktop, Downloads, or external storage.

    For applications that need to access files outside the bottle, permissions may affect runtime behavior as well. For example, an audio editor, CAD tool, or game launcher may appear to install correctly but fail when it tries to access a protected folder. In such cases, moving installers and working files to a simple local directory, such as a folder under your home directory, can reduce complications.

    Use a Clean Bottle for Installation

    A bottle is CrossOver’s isolated Windows environment. Each bottle contains its own registry, drive structure, installed dependencies, and application files. A damaged or poorly configured bottle is one of the most common causes of installation and driver-related errors.

    If an application fails to install, create a new bottle rather than repeatedly attempting to repair the same one. Choose the bottle type recommended by CrossOver or by the application’s compatibility notes. Some applications behave better in a Windows 10 bottle, while older software may prefer a Windows 7 environment.

    1. Open CrossOver.
    2. Select Install or create a new bottle manually.
    3. Choose the correct Windows version for the bottle.
    4. Install required dependencies before installing the main application.
    5. Run the installer from inside CrossOver, not directly from Finder.

    A clean bottle gives you a controlled test environment. If the installation works in a new bottle, the previous problem was probably caused by corrupted settings, conflicting dependencies, or an unsuccessful earlier install.

    Install Required Runtime Components

    Many Windows applications require supporting components such as Microsoft Visual C++ Redistributables, .NET Framework, DirectX runtime files, fonts, or scripting libraries. CrossOver may install some of these automatically if you use a supported installer profile, but manual installations sometimes require extra steps.

    If an installer reports missing DLL files, runtime errors, or initialization failures, identify the missing dependency rather than assuming the entire application is incompatible. Common requirements include:

    • Microsoft Visual C++ Redistributables: Often required by games, engineering tools, and productivity software.
    • .NET Framework: Needed by many business applications and configuration utilities.
    • DirectX components: Important for games and 3D applications, although not every DirectX feature is supported.
    • Core fonts: Required by certain older applications to display menus and dialogs correctly.

    Use CrossOver’s built-in installation options where available. Installing random DLL files from unverified sources is unsafe and can make the bottle unstable. If you need a specific component, obtain it from Microsoft or use CrossOver’s supported dependency installer.

    Troubleshooting Graphics and Display Driver Problems

    Graphics-related issues are often described as “driver problems,” but on macOS the situation is different from Windows. CrossOver does not install native Windows GPU drivers. Instead, it relies on translation layers that connect Windows graphics APIs to macOS graphics technologies.

    Symptoms of graphics problems include black screens, missing textures, flickering windows, poor performance, startup crashes, or errors mentioning DirectX, Vulkan, OpenGL, or Metal. The correct fix depends on the application and your Mac hardware.

    Start by checking CrossOver’s bottle settings. Some applications perform better with enhanced graphics options enabled, while others require them disabled. If your version of CrossOver includes options related to DXVK, D3DMetal, or high-resolution mode, test changes one at a time. Avoid changing multiple settings simultaneously, because that makes it harder to identify which adjustment helped.

    Image not found in postmeta

    Also verify that macOS is fully updated. Apple distributes graphics driver updates as part of macOS updates, not as separate driver packages. If a game or 3D application fails after a recent macOS upgrade, check whether a CrossOver update is available, because compatibility improvements are often released after major macOS changes.

    Understand Hardware Driver Limitations

    Some Windows software installs drivers for printers, scanners, USB security dongles, MIDI devices, measurement equipment, game controllers, or specialized industrial hardware. CrossOver may run the main software interface, but it generally cannot load Windows kernel drivers that directly control hardware.

    If your application requires a hardware driver, determine whether the device has a native macOS driver. If macOS can detect and operate the device, the Windows application may be able to interact with exported files or network services, but direct driver integration is not guaranteed.

    For hardware-dependent applications, consider these alternatives:

    • Use the native macOS version of the device software if available.
    • Install the Windows software in a virtual machine if low-level driver support is required.
    • Use network-based device access where supported, such as network printers or shared measurement devices.
    • Contact the hardware vendor to confirm whether the device requires a Windows kernel driver.

    This is not a CrossOver defect; it is a limitation of how Windows drivers interact with hardware. CrossOver is designed to run applications, not replace the Windows driver model.

    Repair or Reinstall a Problem Bottle

    If an application previously worked but now fails, the bottle may have been damaged by an interrupted update, failed dependency installation, or incompatible configuration change. Before deleting anything, back up the bottle if it contains important data.

    In CrossOver, you can duplicate a bottle or export it as a backup. Once backed up, try basic repair steps: restart CrossOver, reboot the Mac, run the application again, and check whether the issue persists. If the problem began after changing graphics settings, reverse those changes.

    If the application still fails, reinstall the application into a fresh bottle. This is often faster and more reliable than attempting to manually edit registry entries or replace internal files. For business-critical software, document each installation step so the process can be repeated consistently.

    Review Installer Location and File Integrity

    Corrupted or incomplete installers are a frequent source of difficult-to-diagnose errors. If the installer was downloaded through a browser, cloud sync service, or corporate portal, download it again from the official source. Avoid running installers from compressed archives without extracting them first.

    Store the installer in a local folder with a simple path. Avoid special characters, unusually long folder names, external drives with restrictive permissions, or cloud-synchronized folders that may change files during installation. If the vendor provides checksums, verify the installer before running it.

    For multi-part installers, confirm that all files are present in the same folder. Some legacy Windows installers expect supporting CAB, MSI, or data files to be located beside the main setup executable.

    Collect Logs and Error Messages

    Reliable troubleshooting depends on evidence. Instead of relying only on a vague description such as “it crashes,” collect exact error messages, screenshots, and logs. CrossOver can generate logs when launching an application, and these logs may reveal missing libraries, failed registry access, graphics initialization errors, or unsupported driver calls.

    Image not found in postmeta

    When reviewing logs, look for repeated errors near the end of the output. Not every warning is important; Wine-based environments often produce harmless messages. However, errors mentioning missing DLLs, failed Direct3D initialization, .NET runtime failures, or services that cannot start may point to the cause.

    If you contact CodeWeavers support or post in a technical forum, include your macOS version, CrossOver version, Mac model, processor type, application version, bottle type, and the exact steps that trigger the failure. Good information leads to better answers.

    When to Use a Virtual Machine Instead

    CrossOver is efficient because it does not require a full Windows installation, but it is not always the right tool. If the application depends on kernel drivers, complex device services, enterprise endpoint security, low-level licensing systems, or unsupported anti-cheat technology, a Windows virtual machine may be more suitable.

    A virtual machine provides a more complete Windows environment, including broader support for Windows services and some driver stacks. However, even virtual machines have limits, particularly with GPU-intensive software or USB devices that require precise timing. For demanding professional workflows, test thoroughly before committing.

    Preventing Future Problems

    Once you have a working CrossOver configuration, protect it. Avoid unnecessary changes to a stable bottle. Before installing updates, dependencies, or plugins, duplicate the bottle or create a backup. This gives you a recovery point if the update breaks the application.

    • Keep CrossOver updated, especially after major macOS upgrades.
    • Back up working bottles before making significant changes.
    • Install one application per bottle when possible to reduce conflicts.
    • Record successful settings for graphics, Windows version, and dependencies.
    • Avoid unofficial patches unless you fully trust the source and understand the risk.

    Final Thoughts

    Troubleshooting CrossOver installation and driver problems on macOS requires a methodical approach. Confirm compatibility first, then check permissions, bottle health, dependencies, installer integrity, and graphics settings. For driver-related failures, be realistic about CrossOver’s architecture: it can run many Windows applications, but it does not provide full Windows kernel driver support.

    For many users, the solution is as simple as updating CrossOver, creating a clean bottle, or installing a missing runtime. For hardware-dependent software, the answer may be a native Mac driver, a different workflow, or a Windows virtual machine. By testing carefully and preserving known-good configurations, you can reduce downtime and make CrossOver a dependable part of your macOS setup.

  • Best Instagram Apps for Mac Users in 2026

    Best Instagram Apps for Mac Users in 2026

    For Mac users in 2026, Instagram work is no longer limited to scrolling through a phone screen. Creators, social media managers, small businesses, photographers, and agencies now rely on Mac-friendly tools for planning posts, editing Reels, managing comments, tracking analytics, and collaborating across teams. The best Instagram apps for Mac users are usually a mix of official Meta tools, browser-based platforms, and powerful creative software that fits naturally into a macOS workflow.

    TLDR: The best Instagram apps for Mac users in 2026 include Instagram on the web, Meta Business Suite, Later, Buffer, Metricool, Canva, Adobe Express, Lightroom, and CapCut. Mac users who need simple posting and messaging should start with Instagram’s web app, while brands and agencies usually benefit from scheduling and analytics platforms. For content creation, photo editing, and short-form video, design and editing apps are just as important as Instagram management tools.

    What Makes a Good Instagram App for Mac in 2026?

    A strong Instagram app for Mac should do more than open a feed in a browser. The best options help users save time, maintain visual consistency, and publish content without constantly switching between devices. Since Instagram’s API rules are strict, the most reliable tools are those that work with official Meta integrations and avoid risky automation.

    In 2026, Mac users should look for safe account access, post and Reel scheduling, comment management, analytics, content creation features, and cross-platform syncing. Apps that support Apple Silicon performance, cloud storage, and team workflows are especially useful for professionals.

    Image not found in postmeta

    1. Instagram Web App

    Best for: everyday browsing, posting, messaging, and quick account checks.

    Instagram’s web experience has improved significantly, making it one of the easiest options for Mac users. It works in Safari, Chrome, Edge, and other modern browsers, and it can be saved to the Dock as a web app on supported macOS versions. This gives users a more app-like experience without installing a third-party client.

    Users can view the feed, upload posts, manage direct messages, watch Reels, and interact with comments. For casual creators and small businesses, this may be enough. However, it is not the best option for advanced scheduling, content calendars, team approvals, or detailed analytics.

    • Pros: free, official, easy to access, safe login.
    • Cons: limited planning tools and fewer professional workflow features.

    2. Meta Business Suite

    Best for: businesses managing Instagram and Facebook together.

    Meta Business Suite remains one of the most important Instagram tools for Mac users in 2026. It runs in the browser and allows businesses to manage posts, Stories, messages, comments, ads, and analytics from one place. Since it is an official Meta product, it is one of the safest choices for users who want account stability.

    Its biggest advantage is that it connects Instagram and Facebook management. Businesses can schedule content, review audience insights, respond to messages, and track post performance without using a phone. It is especially useful for local businesses, ecommerce brands, consultants, and service providers.

    The interface can feel busy, but its official status and broad feature set make it a practical foundation for professional Instagram management.

    3. Later

    Best for: visual planning, scheduling, and creator workflows.

    Later is one of the most polished Instagram planning tools for Mac users. Its visual calendar helps creators arrange posts before publishing, which is particularly useful for feeds that depend on aesthetic consistency. Later supports scheduling for posts, Reels, Stories, and multiple social platforms, depending on the selected plan and Instagram account type.

    Mac users often prefer Later because it feels organized and easy to understand. The drag-and-drop calendar, media library, link-in-bio features, and performance reports make it a strong choice for influencers, boutiques, photographers, and lifestyle brands.

    • Standout feature: visual feed preview for planning an Instagram grid.
    • Good fit: creators who care about brand style and posting consistency.

    4. Buffer

    Best for: simple scheduling across multiple social channels.

    Buffer is ideal for Mac users who want a clean, straightforward way to schedule Instagram content. It offers a simple queue system, calendar views, basic analytics, and team collaboration tools. It is not the most advanced visual planner, but it is dependable and easy to learn.

    For freelancers and small teams, Buffer’s simplicity is a major benefit. A user can draft captions, schedule posts, review performance, and manage multiple accounts with minimal friction. It is also useful for brands that post across Instagram, LinkedIn, Facebook, TikTok, and other platforms.

    Buffer is best for users who prefer clarity over complexity. It may not offer every high-end analytics feature, but it handles everyday publishing very well.

    5. Metricool

    Best for: analytics, reporting, and competitive tracking.

    Metricool has become a favorite among social media managers who need more than a posting calendar. It combines scheduling, analytics, competitor monitoring, hashtag tracking, and reporting in a browser-based dashboard that works smoothly on Mac.

    For Instagram, Metricool helps teams understand what content is working, when audiences are active, and how performance changes over time. It is particularly valuable for agencies that need client reports, as well as businesses that want data without building spreadsheets manually.

    Image not found in postmeta
    • Pros: strong reporting, multi-platform support, useful analytics.
    • Cons: may feel data-heavy for casual Instagram users.

    6. Planoly

    Best for: Instagram-first visual planning and ecommerce content.

    Planoly is another strong choice for Mac users who want a visual-first Instagram planning experience. It allows creators and brands to map out posts, organize media, prepare captions, and preview the overall look of a profile. For businesses with product launches, seasonal campaigns, or influencer collaborations, this kind of visual planning can reduce last-minute content stress.

    Planoly is especially useful for fashion, beauty, interior design, wellness, and ecommerce brands. Its planning style encourages users to think about Instagram as a visual storefront rather than a random posting channel.

    7. Canva

    Best for: designing Instagram posts, Stories, carousels, and ads.

    Although Canva is not only an Instagram management tool, it is one of the most useful Instagram apps for Mac users. It runs in a browser and also offers desktop options, making it easy to create professional-looking posts without complex design software.

    Canva’s templates are useful for carousels, Reels covers, Stories, highlights, ads, and promotional graphics. Teams can create brand kits with fonts, colors, and logos, helping every Instagram post stay consistent. For small businesses without a full design department, this can be a major advantage.

    In 2026, Canva remains one of the easiest ways for non-designers to produce polished Instagram visuals on a Mac.

    8. Adobe Express

    Best for: quick branded graphics and content variations.

    Adobe Express is a strong alternative for Mac users who want fast social graphics, simple video assets, and brand-safe templates. It works well for creators already using Adobe tools, and it provides a more beginner-friendly experience than advanced apps like Photoshop or Premiere Pro.

    For Instagram, Adobe Express can be used to build promotional posts, resize assets, animate text, create Story graphics, and prepare branded content quickly. It is a practical choice for marketers who need attractive visuals without launching a full design workflow.

    9. Adobe Lightroom

    Best for: photographers, travel creators, and polished photo feeds.

    Lightroom is one of the most valuable Instagram apps for Mac users who care about image quality. It offers professional photo editing, presets, batch adjustments, color grading, and cloud syncing between Mac and mobile devices. This makes it easy to edit on a large Mac screen and later publish from a phone or scheduling tool.

    Photographers, food bloggers, real estate professionals, and lifestyle creators can use Lightroom to maintain a consistent visual identity. Its non-destructive editing also means original images remain safe while multiple Instagram-ready versions are created.

    Image not found in postmeta

    10. CapCut

    Best for: Reels, short-form video, captions, and trend-based edits.

    Reels remain central to Instagram growth in 2026, and CapCut is one of the most accessible video editing tools for Mac users. It offers templates, effects, transitions, subtitles, background removal, music tools, and export settings suited for vertical video.

    CapCut is particularly useful for creators who need to edit quickly while still producing content that feels modern. Brands use it for tutorials, product videos, behind-the-scenes clips, event recaps, and influencer-style content. While professional editors may prefer Final Cut Pro or Premiere Pro, CapCut is often faster for social-first videos.

    11. Final Cut Pro

    Best for: advanced Reel production and professional video workflows.

    Final Cut Pro remains a powerful choice for Mac users who produce high-quality Instagram video content. It benefits from Apple Silicon performance, smooth timeline editing, excellent color tools, and strong media organization. For creators producing interviews, campaigns, mini-documentaries, or cinematic Reels, Final Cut Pro offers more control than lightweight editors.

    It may be more than casual users need, but professional creators and agencies can justify the investment. When paired with Compressor, Motion, or professional audio tools, it becomes a full production environment for Instagram and beyond.

    How Mac Users Should Choose the Right Instagram App

    The best choice depends on the user’s goals. A casual creator may only need Instagram on the web, Canva, and CapCut. A small business may prefer Meta Business Suite, Later, and Lightroom. An agency may build a workflow around Metricool, Buffer, Adobe tools, and advanced approval systems.

    Before choosing an app, Mac users should consider:

    • Account safety: tools should use official integrations whenever possible.
    • Content type: photo-heavy accounts need editing tools, while video-heavy accounts need Reel editors.
    • Team size: agencies need approvals, permissions, and reports.
    • Budget: free tools may be enough for beginners, while paid tools save time at scale.
    • Workflow: the best app is the one that fits naturally into daily Mac usage.

    Recommended Instagram App Stacks for Mac Users

    For casual creators: Instagram Web App, Canva, CapCut, and Lightroom Mobile syncing.

    For small businesses: Meta Business Suite, Later, Canva, and Adobe Express.

    For agencies: Metricool, Buffer or Later, Adobe Creative Cloud tools, and Final Cut Pro.

    For photographers: Lightroom, Instagram Web App, Planoly, and Canva for promotional graphics.

    Final Thoughts

    The best Instagram apps for Mac users in 2026 are not limited to one perfect tool. Instead, most successful users combine a management platform, a design tool, a photo editor, and a video editor. Instagram’s own web app and Meta Business Suite provide a reliable starting point, while Later, Buffer, Metricool, and Planoly add planning and analytics power.

    For creative work, Canva, Adobe Express, Lightroom, CapCut, and Final Cut Pro help Mac users produce stronger content before it ever reaches Instagram. The smartest approach is to build a workflow that is safe, efficient, and realistic for the account’s goals.

    FAQ

    What is the best Instagram app for Mac users in 2026?

    The best overall option depends on the use case. Instagram on the web is best for basic access, Meta Business Suite is best for official business management, and Later or Metricool are better for scheduling and analytics.

    Can Instagram be used as a Mac app?

    Instagram can be used through a browser, and on supported macOS versions it can be saved as a web app for easier Dock access. This creates an app-like experience, although it is still based on Instagram’s web platform.

    Are third-party Instagram apps safe?

    Third-party tools are safest when they use official Meta integrations. Mac users should avoid apps that ask for suspicious login methods, promise follower automation, or violate Instagram’s platform rules.

    What is the best Mac app for Instagram Reels?

    CapCut is one of the best easy options for Reels, while Final Cut Pro is better for advanced video production. Adobe Premiere Pro is also useful for professional teams.

    What is the best tool for scheduling Instagram posts on Mac?

    Later, Buffer, Planoly, and Metricool are all strong scheduling choices. Later and Planoly are more visual, Buffer is simpler, and Metricool is stronger for reporting.

    Do Mac users still need a phone for Instagram?

    In many cases, Mac users can manage posts, messages, comments, and analytics from desktop tools. However, a phone may still be useful for capturing content, testing mobile layout, using certain Instagram-native features, and publishing content types that require mobile access.

  • How Do You Log In to Klaviyo?

    How Do You Log In to Klaviyo?

    Logging in to Klaviyo is usually a quick process, but the exact steps can vary depending on whether an account uses a standard email and password, Google sign-in, single sign-on, or two-factor authentication. Klaviyo is a marketing automation platform used for email, SMS, customer segmentation, analytics, and ecommerce growth, so secure access is an important part of daily workflow for marketers, store owners, and account managers.

    TLDR: To log in to Klaviyo, a user visits the Klaviyo login page, enters the email address associated with the account, and completes the required authentication step. If the account uses a password, they enter it; if it uses Google sign-in, SSO, or two-factor authentication, they follow those prompts instead. If login fails, the most common fixes are resetting the password, checking the correct email address, clearing browser issues, or contacting an account administrator.

    Understanding the Klaviyo Login Process

    Klaviyo’s login process is designed to confirm that the person accessing the account is authorized to view customer data, campaigns, flows, lists, segments, and reporting. Since many Klaviyo accounts contain sensitive customer and ecommerce information, the platform may use multiple security layers. These can include a password, an email verification step, two-factor authentication, or an organization-based single sign-on method.

    In most cases, a user begins by opening a web browser and going to the Klaviyo login page. From there, they enter the email address linked to the account. If the email is recognized and the account is active, the platform displays the next required step. This may be a password field, a Google login prompt, an SSO redirect, or a verification request.

    Image not found in postmeta

    Step-by-Step: How a User Logs In to Klaviyo

    The most common login method is the standard email and password process. A user can follow these steps:

    1. Open a trusted browser: The user should open a modern browser such as Chrome, Safari, Firefox, or Edge.
    2. Go to the Klaviyo login page: They can visit Klaviyo’s main website and select the login option, or go directly to the app login page if it has been bookmarked.
    3. Enter the account email address: The email must match the address used to create the Klaviyo profile or the address that received the account invitation.
    4. Enter the password: If password login is enabled, the user types the password associated with that email address.
    5. Complete any security prompt: If two-factor authentication is required, the user enters the code from the authentication app, SMS, or other configured method.
    6. Access the dashboard: After successful authentication, Klaviyo loads the account dashboard or prompts the user to select an account if they have access to more than one.

    Once inside the platform, the user may see campaign metrics, recent activity, flows, ecommerce integrations, or the main navigation menu. The exact view depends on the account setup and the user’s permissions.

    Logging In with Google or Single Sign-On

    Some Klaviyo users may not use a traditional password. Instead, their organization may allow or require login through Google sign-in or single sign-on. These methods are common for companies that want centralized identity management and stronger security controls.

    If Google sign-in is available, the user selects the Google option on the login screen and chooses the correct Google account. If the selected Google account matches an authorized Klaviyo user, access continues. If it does not match, Klaviyo may reject the login or ask for a different email address.

    With single sign-on, the user is usually redirected to the company’s identity provider. This might be a corporate login page managed by an IT department. After the user successfully signs in there, they are redirected back to Klaviyo. In this situation, password resets may need to happen through the company’s identity system rather than through Klaviyo directly.

    Two-Factor Authentication and Security Checks

    Two-factor authentication, often called 2FA, adds an additional layer of protection. Instead of relying only on a password, Klaviyo may require a temporary code. This code can come from an authentication app or another approved method, depending on the account’s security settings.

    Image not found in postmeta

    If two-factor authentication is enabled, a user should keep access to the configured device or app. Losing access to the authentication method can prevent login, even when the password is correct. In that case, the user may need help from the account owner, an administrator, or Klaviyo support, depending on the recovery options available.

    Security checks may also appear when Klaviyo detects unusual login behavior. For example, a login attempt from a new device, new location, or unfamiliar browser may trigger additional verification. These checks are intended to protect the account from unauthorized access.

    What to Do If the Password Is Forgotten

    If a user cannot remember the password, the best first step is to use the password reset option on the login page. The reset process usually requires access to the email address connected to the Klaviyo user profile. After submitting the email address, the user should check the inbox for a password reset message.

    When resetting a password, the user should create one that is both secure and unique. A strong password typically includes a mixture of uppercase letters, lowercase letters, numbers, and symbols. It should not be reused from other services, especially services connected to ecommerce platforms, email providers, or payment tools.

    If the password reset email does not arrive, the user should check spam, junk, promotions, and quarantine folders. They should also confirm that the correct email address was entered. In some cases, an organization’s email filtering system may delay or block automated messages, so an administrator may need to review email security settings.

    Common Reasons Klaviyo Login Fails

    Several issues can prevent a user from logging in, even when they believe the correct details are being used. The most common causes include:

    • Incorrect email address: The user may be entering a personal email instead of the business email attached to the account.
    • Incorrect password: A saved password may be outdated, especially after a recent reset.
    • Browser cache or cookie problems: Old session data can sometimes interfere with login.
    • Expired invitation: A new user may be trying to access Klaviyo through an invitation that is no longer valid.
    • Missing permissions: The user may not have been added to the correct Klaviyo account.
    • SSO mismatch: The company’s identity provider may not recognize the user or may require an internal permission update.
    • 2FA access loss: The user may no longer have the phone, app, or device needed to receive the security code.

    To troubleshoot, a user can try an incognito or private browser window, clear cookies for Klaviyo, disable interfering browser extensions, or attempt login from another browser. However, if the issue appears related to permissions, invitations, SSO, or two-factor recovery, an account administrator is usually the best first contact.

    Logging In After Receiving an Invitation

    Many users access Klaviyo for the first time through an invitation sent by an account owner or administrator. The invitation email typically contains a link that allows the recipient to set up access. The user should open the invitation from the same email address that the administrator invited.

    If the user already has a Klaviyo profile, they may simply be added to the new account. If they do not have an existing profile, they may be asked to create credentials. After setup is complete, the user can log in normally and select the appropriate account if multiple accounts are available.

    Account permissions may vary. For example, one user may have full administrative control, while another may only view campaigns, create flows, or access reporting. If certain features are missing after login, the issue may not be a login problem. Instead, it may be a permissions limitation set by the account owner.

    Best Practices for Safe Klaviyo Access

    Because Klaviyo can contain customer profiles, revenue data, SMS consent records, and email engagement history, login security should be treated seriously. A user should avoid sharing credentials with coworkers or agencies. Instead, each person should have a separate user profile with the appropriate access level.

    Strong security habits include:

    • Using a unique password for Klaviyo.
    • Enabling two-factor authentication when available.
    • Keeping recovery email access secure.
    • Removing users who no longer need account access.
    • Reviewing permissions for agency partners and contractors.
    • Avoiding login from public or untrusted computers.
    • Signing out after using shared devices.
    Image not found in postmeta

    Administrators should also review user access periodically. When employees change roles or leave a company, their permissions should be updated or removed promptly. This reduces the risk of unauthorized changes to campaigns, flows, integrations, and customer data.

    Accessing Multiple Klaviyo Accounts

    Some users, especially agency team members or consultants, may have access to multiple Klaviyo accounts. After login, Klaviyo may display an account selection option or allow switching between accounts from within the platform. The user should confirm that they are working in the correct account before editing campaigns, flows, forms, or settings.

    This is especially important when users manage several brands. Sending a campaign from the wrong account, editing the wrong flow, or changing the wrong integration can create confusion and business risk. Clear account names, organized permissions, and careful review before publishing changes can help prevent mistakes.

    When to Contact Support or an Administrator

    If standard troubleshooting does not solve the login issue, the next step depends on the type of problem. For a company-managed account, the internal Klaviyo administrator should usually be contacted first. That person can confirm whether the user exists, whether the invitation is still active, and whether permissions are correct.

    If the problem involves technical access, such as account recovery, two-factor authentication lockout, or a login error that affects multiple users, Klaviyo support may be needed. The user should be ready to provide the email address used for login, a description of the problem, the approximate time it occurred, and any error message shown on screen.

    FAQ

    How does a user log in to Klaviyo?

    A user logs in by visiting the Klaviyo login page, entering the email address connected to the account, and completing the required authentication step. This may include entering a password, using Google sign-in, completing SSO, or entering a two-factor authentication code.

    What should happen if a user forgets the Klaviyo password?

    The user should select the password reset option on the login page and enter the account email address. If the reset message does not arrive, spam and junk folders should be checked, and the user should confirm that the correct email address was entered.

    Can a user log in to Klaviyo with Google?

    Some accounts may support Google sign-in. If this option is available, the user can select it and choose the Google account that matches the authorized Klaviyo email address.

    Why does Klaviyo ask for a security code?

    Klaviyo may ask for a security code when two-factor authentication is enabled or when a login attempt appears unusual. This helps protect the account from unauthorized access.

    What if a user no longer has access to the two-factor authentication device?

    The user may need help from an account administrator or Klaviyo support. Recovery options depend on the account’s security settings and the user’s role.

    Why can a user log in but not see certain features?

    The account may have limited permissions for that user. An administrator can review and adjust access levels if additional features or settings are needed.

    Can multiple people share one Klaviyo login?

    Sharing one login is not recommended. Each person should have an individual user account with permissions appropriate to their role, which improves security and accountability.

  • Best LINE App Language Translation Features and Third-Party Tools

    Best LINE App Language Translation Features and Third-Party Tools

    LINE is widely used for personal conversations, customer support, community groups, and cross-border business communication, especially across Asia. When participants do not share the same language, translation becomes more than a convenience: it affects accuracy, trust, response time, and even business outcomes. The best approach is usually a combination of LINE’s built-in or official translation options and carefully selected third-party tools that provide stronger accuracy, document handling, speech translation, or privacy controls.

    TLDR: LINE can support multilingual communication through official translation accounts, available in-app translation options, and external translation services. For casual chats, LINE’s own tools or quick mobile translation apps may be enough, while business users should consider more accurate services such as DeepL, Google Translate, Microsoft Translator, Papago, or professional translation workflows. The most important factors are accuracy, privacy, speed, language coverage, and ease of use. Sensitive or formal communication should always be reviewed by a human speaker or professional translator before being sent.

    Understanding Translation in the LINE App

    LINE has historically supported translation in different ways depending on country, device, app version, and language pair. In some markets, users may have access to translation features inside chats, while others rely on official translation accounts or third-party apps. Because availability can change, it is wise to check the current LINE app settings, official help pages, and the list of available official accounts in your region.

    One of the most familiar translation methods in LINE has been the use of official translator accounts. These accounts can be added as friends and invited into chats, allowing users to translate messages between supported languages. In practice, this can be useful for small group conversations, travel planning, simple customer inquiries, and informal exchanges. However, users should understand that machine translation is not perfect and can misinterpret idioms, slang, honorifics, or industry-specific terms.

    Image not found in postmeta

    Key LINE Translation Features to Look For

    When evaluating LINE’s translation capabilities, focus on features that improve communication without making the chat experience complicated. The best translation setup should feel natural, fast, and reliable enough for the type of conversation you are having.

    • Message translation: The ability to translate individual chat messages is the most important feature for everyday use. This is useful when you receive a message in another language and need a fast understanding of its meaning.
    • Group chat support: Translation tools are especially valuable in group chats where members speak different languages. A translator account or integrated translation feature can reduce confusion and keep discussions moving.
    • Multiple language pairs: Strong support for languages such as Japanese, Korean, Chinese, English, Thai, Indonesian, Spanish, French, and Vietnamese can be essential depending on your contacts.
    • Simple activation: Translation should not require complex copying, pasting, or switching between apps every few seconds. The fewer steps involved, the more useful the tool becomes.
    • Reasonable accuracy: A translation that is fast but misleading can create problems. Accuracy matters most in business, legal, medical, educational, and technical conversations.

    Official LINE Translator Accounts

    Official translator accounts are among the easiest ways to add translation support to LINE conversations when they are available. A user can add the translator account as a friend, then send text to it or invite it into a chat. The account then returns a translated version of the message. This approach can be simple and practical, especially for users who do not want to install additional apps.

    The main advantage is convenience. Since the translation happens inside LINE, users can stay within the same communication environment. This is particularly useful for families, international friends, and small teams that communicate primarily through LINE. The setup is also generally easier for people who are not technically confident.

    However, official translator accounts may have limitations. They may support only certain language combinations, and their availability may vary by region. They may also struggle with long messages, mixed-language sentences, informal abbreviations, sarcasm, and highly specialized vocabulary. For important communication, it is better to treat these translations as a draft understanding rather than a final authoritative translation.

    Built-In Translation and Device-Level Support

    Some users may be able to translate LINE content through operating system features or app-level options. Android and iOS both offer tools that can help translate selected text, screenshots, or copied messages. Depending on your device, you may be able to select text and use a translation option from the share menu, keyboard, or system assistant.

    For example, Android users often rely on Google Translate features such as tap-to-translate, clipboard translation, or screen translation, depending on device settings and app permissions. iPhone users may use Apple’s Translate app, Live Text for images, or the share sheet to translate copied content. These tools are not exclusive to LINE, but they can make LINE chats easier to understand.

    This method is especially helpful when LINE’s own translation options do not support the language pair you need. The drawback is that it can involve extra steps: copying text, switching apps, or taking screenshots. For frequent multilingual conversations, that friction can become inconvenient.

    Best Third-Party Translation Tools for LINE Users

    Third-party translation tools can improve accuracy, flexibility, and language coverage. They are especially valuable for business users, travelers, students, remote teams, and anyone speaking with contacts across several countries.

    Google Translate

    Google Translate is one of the most practical tools for LINE users because it supports a very large number of languages and offers text, voice, image, and website translation. Its mobile app can translate copied text and, in some cases, assist with translations over other apps. It is particularly useful for casual communication, travel, quick replies, and understanding the general meaning of messages.

    Its strengths are speed, broad language support, and ease of access. Its weakness is that quality can vary depending on the language pair and subject matter. It may handle common phrases well but struggle with nuance, formality, or technical terminology.

    DeepL

    DeepL is respected for producing natural-sounding translations in many European and major Asian language pairs. It is often preferred for business communication, longer messages, and polished writing. For LINE users who need to send a careful message to a client, partner, or colleague, DeepL can be a strong choice.

    DeepL’s writing style is often more fluent than basic machine translation, but it supports fewer languages than Google Translate. Users should also pay attention to privacy settings and whether they are using the free or paid version, especially when translating confidential text.

    Microsoft Translator

    Microsoft Translator is a reliable option for text and speech translation. It is particularly useful in professional environments already using Microsoft services. It supports many languages and can be effective for meetings, short conversations, and mobile translation workflows.

    For LINE users, Microsoft Translator works well as a companion app. You can copy messages from LINE, translate them, and then paste your reply back into the chat. It is not always the fastest method, but it is dependable for users who value a mainstream, business-friendly service.

    Image not found in postmeta

    Papago

    Papago, developed by Naver, is especially strong for Korean and several Asian languages. It is a serious option for LINE users communicating in Korean, Japanese, Chinese, English, Vietnamese, Thai, or Indonesian. In many everyday Asian language contexts, Papago can produce translations that feel more natural than some broader translation engines.

    Papago is useful for travel, social messages, shopping, customer service, and casual business exchanges. As with all machine translation, users should be careful with formal documents, legal meaning, or sensitive negotiations.

    iTranslate and Other Mobile Translation Apps

    iTranslate and similar mobile apps can be useful for users who want voice translation, phrasebooks, offline language packs, or simple travel support. These tools are less about deep text accuracy and more about convenience. They are practical when you need quick help composing a message, understanding a short reply, or translating spoken phrases before sending them through LINE.

    Using OCR and Screenshot Translation

    LINE conversations often include images, menus, flyers, product labels, documents, and screenshots. Standard text translation tools may not help if the content is embedded in an image. This is where OCR, or optical character recognition, becomes important.

    Google Lens, Apple Live Text, Papago image translation, and other OCR services can identify text inside images and translate it. This is useful when a LINE contact sends a restaurant menu, event notice, shipping label, product instruction, or handwritten note. For international shopping and travel, screenshot translation can be extremely helpful.

    Users should remember that OCR accuracy depends on image quality. Blurry screenshots, stylized fonts, handwriting, poor lighting, and crowded layouts can produce errors. It is best to ask the sender for a clearer image or typed text if the translation seems confusing.

    Privacy and Security Considerations

    Translation tools can expose sensitive information if used carelessly. When you copy a LINE message into a third-party app, that text may be processed on external servers. This is not automatically unsafe, but it does require judgment. Personal identification numbers, addresses, financial information, contracts, medical details, internal company discussions, and private customer data should be handled carefully.

    For business use, review the privacy policy of the translation provider. Paid business plans may offer stronger confidentiality terms than free consumer tools. Companies should create clear internal rules about what employees may translate with public tools and what must go through approved systems or professional translators.

    A practical rule is simple: if a message would cause harm if leaked, do not paste it into a public translation tool without permission and proper safeguards.

    Accuracy: When Machine Translation Is Enough and When It Is Not

    Machine translation is excellent for understanding general meaning. It is usually enough for casual greetings, scheduling, travel questions, shopping, simple customer support, and everyday conversation. In these cases, speed matters more than perfect wording.

    However, machine translation may not be enough for contracts, complaints, medical explanations, financial discussions, legal notices, immigration matters, marketing copy, or emotionally sensitive messages. These situations require precision and cultural understanding. A machine may translate the words but miss the tone, implication, or legal significance.

    For important LINE conversations, consider writing in short, clear sentences. Avoid idioms, jokes, slang, and ambiguous references. After translating, translate the result back into your original language to check whether the meaning stayed consistent. This “back translation” method is not perfect, but it can reveal obvious problems before you send a message.

    Best Practices for Translating LINE Chats

    • Keep sentences short: Short sentences are easier for translation engines to process accurately.
    • Use plain language: Avoid metaphors, local slang, and abbreviations unless you are sure they will be understood.
    • Confirm important details: Dates, prices, addresses, names, and deadlines should be repeated clearly.
    • State when you are using translation: A simple note such as “I am using a translation tool” can reduce misunderstandings.
    • Use human review for serious matters: Professional or native-speaker review is essential for high-stakes communication.
    Image not found in postmeta

    Choosing the Right Translation Setup

    The best setup depends on how you use LINE. For occasional personal chats, an official LINE translator account or Google Translate may be sufficient. For frequent conversations in Korean or Japanese, Papago or DeepL may provide better results depending on the language pair. For professional communication, a combination of DeepL, Microsoft Translator, approved company tools, and human review is often more appropriate.

    If you manage customer communication through LINE, consistency is especially important. Prepare approved translated templates for common questions, shipping updates, appointment reminders, refund policies, and support responses. This reduces mistakes and ensures your brand communicates professionally in every language.

    Conclusion

    LINE can be a strong platform for multilingual communication when paired with the right translation features and tools. Official translator accounts and device-level translation options are convenient for quick understanding, while third-party tools such as Google Translate, DeepL, Microsoft Translator, Papago, and OCR-based apps provide broader capabilities. The most trustworthy approach is not to rely blindly on any single tool, but to match the translation method to the importance of the conversation.

    For casual chats, speed and convenience may be enough. For business, legal, medical, or sensitive communication, accuracy and privacy must come first. Used carefully, LINE translation tools can reduce language barriers, support international relationships, and make cross-border communication more practical and reliable.

  • What Is Reddit Wrapped and How Does It Work?

    What Is Reddit Wrapped and How Does It Work?

    Reddit is like a giant internet playground. People trade jokes, ask questions, argue about soup, share cat photos, and join tiny communities about very specific things. At the end of the year, Reddit gives many users a fun look back at what they did. People often call this Reddit Wrapped, though Reddit usually calls it Reddit Recap.

    TLDR: Reddit Wrapped is a yearly summary of your Reddit activity. It shows things like your favorite communities, popular posts, karma, and time spent scrolling. It works by using activity data from your Reddit account during the year. It is meant to be fun, simple, and shareable.

    So, What Is Reddit Wrapped?

    Reddit Wrapped is a nickname for Reddit’s yearly recap feature. It is similar to Spotify Wrapped, but for Reddit. Instead of songs and artists, it shows your posts, comments, communities, and other Reddit habits.

    Reddit may call it Reddit Recap. Users call it Wrapped because that name is easy to understand. It means, “Here is your year, wrapped up in a neat little package.”

    Your recap may show things like:

    • Your most visited subreddits.
    • Your most successful posts.
    • Your top comments.
    • Your karma earned during the year.
    • Your favorite topics.
    • Fun stats about your scrolling.
    • A shareable card about your Reddit personality.

    It is not a serious report card. Nobody is grading you. It is more like a silly mirror. Sometimes the mirror says, “Wow, you spent a lot of time reading about houseplants.”

    Image not found in postmeta

    Why Do People Like It?

    People love summaries. They help us see patterns. They also make normal habits feel special. A year of random clicking becomes a story.

    Maybe you joined Reddit to ask one question about a broken laptop. Then somehow you became a regular in three cooking communities. You learned how to bake bread. You argued about cast iron pans. You upvoted a raccoon wearing a hat. Reddit Wrapped puts all of that chaos into a tidy little highlight reel.

    It is also very shareable. Many users post screenshots of their recap. They compare communities. They laugh at weird stats. They say things like, “I did not know I was this obsessed with space photos.”

    That is part of the fun. Reddit Wrapped turns private browsing habits into a light social game. You can share it if you want. You can keep it secret if it is too embarrassing. No judgment. Well, maybe a little judgment from your friends.

    How Does Reddit Wrapped Work?

    Reddit Wrapped works by collecting and organizing activity from your account. Reddit already tracks certain actions so the site can function. For the recap, it turns some of that activity into simple stats and fun visuals.

    It may look at things like:

    • Which subreddits you visited.
    • Which communities you joined.
    • Posts you created.
    • Comments you made.
    • Upvotes your posts or comments received.
    • Karma gained.
    • How often you used Reddit.
    • Topics you interacted with.

    Then Reddit sorts the information. It finds your top communities. It picks out popular moments. It builds a card or slideshow. The design is usually bright, playful, and easy to share.

    Think of it like a robot scrapbook. The robot flips through your Reddit year. It chooses the funniest, biggest, or most repeated things. Then it says, “Here, human. This is what you did.”

    Is It Exactly Like Spotify Wrapped?

    Not exactly. But the idea is similar.

    Spotify Wrapped shows your top songs, artists, genres, and minutes listened. Reddit Wrapped shows your Reddit activity. That means communities, karma, posts, comments, and topics.

    The big difference is that Reddit is not one type of activity. Music is music. Reddit is everything. One person uses Reddit for news. Another uses it for memes. Another reads legal advice. Another quietly studies aquarium filters.

    So Reddit Wrapped can feel more random. It can also feel more personal. Your recap might reveal your hobbies, your questions, and your late-night rabbit holes.

    What Can You See in Reddit Wrapped?

    The exact details can change each year. Reddit may add new sections or remove old ones. Still, most recaps focus on your activity and your communities.

    Common sections may include:

    • Top subreddits: The communities where you spent the most time.
    • Karma highlights: How much karma you earned from posts and comments.
    • Popular posts: Posts that got attention.
    • Popular comments: Comments that people liked.
    • Community stats: Groups where you were active.
    • Topic interests: Themes that matched your Reddit behavior.
    • Share card: A fun image you can post or save.

    In some years, Reddit has used playful measurements. For example, it has shown scrolling in “bananas.” This became a Reddit joke. Why bananas? Because the internet loves strange units. Also, bananas are funny. That is science.

    Image not found in postmeta

    Where Do You Find Reddit Wrapped?

    When Reddit Recap is available, Reddit usually promotes it inside the app or on the website. You may see a banner, button, or card. It often appears near the end of the year.

    To find it, you can try these steps:

    1. Open the Reddit app or website.
    2. Log in to your account.
    3. Look for a Recap or Year in Review button.
    4. Tap or click it.
    5. Move through the slides.
    6. Save or share the final card, if you want.

    If you do not see it, do not panic. It may not be live yet. It may also not be available in your region, version, or account type. Updating your app can help. Checking Reddit’s announcements can help too.

    Why Can’t I See My Reddit Wrapped?

    Sometimes users do not get a recap. This can happen for a few reasons.

    • You did not use Reddit enough during the year.
    • Your account is too new.
    • The feature is not available yet.
    • Your app needs an update.
    • You are using an account type that does not qualify.
    • Reddit changed how the feature works that year.

    Reddit needs enough activity to build a good summary. If your account was quiet, there may not be much to show. A recap saying “You opened Reddit twice and left” would be very honest. But not very exciting.

    Does Reddit Wrapped Show Private Information?

    Reddit Wrapped is designed as a personal recap. It usually focuses on visible account activity and usage patterns. It is not meant to expose private messages or secret details.

    Still, you should be careful before sharing screenshots. Your recap might reveal communities you visit. It might show usernames, posts, or interests. That may be fine. Or it may be something you want to keep private.

    Before you post your recap, ask yourself:

    • Am I okay with people seeing these communities?
    • Does this show my username?
    • Does this reveal personal interests?
    • Could this be misunderstood?

    If the answer feels awkward, keep it to yourself. You can still enjoy it. Not every internet treat needs to become content.

    How Accurate Is It?

    Reddit Wrapped is usually accurate enough for fun. But it may not be perfect. It depends on what Reddit measures and how it counts activity.

    For example, it may count visits in one way and interactions in another. It may ignore certain private or deleted activity. It might focus on the communities where you were most active, not the ones you loved the most.

    So if your recap says your top subreddit was about lawn care, but you only remember visiting it during one stressful weekend, do not take it personally. Data can be weird. Humans are weird too.

    What Is Karma in Reddit Wrapped?

    Karma is Reddit’s point system. You can earn it when people upvote your posts or comments. You can lose some when people downvote them. It is not money. It is not a prize. It is more like internet applause.

    Reddit Wrapped may show how much karma you earned during the year. This can be fun if one of your comments exploded. Maybe you made a joke. Maybe you explained taxes. Maybe you said “same” at the perfect time.

    Karma does not always mean quality. A silly meme can get more karma than a thoughtful answer. That is Reddit. It contains wisdom and nonsense in equal amounts.

    What Are Subreddits?

    If you are new to Reddit, this part matters. A subreddit is a community inside Reddit. Each one has a topic. The name usually starts with “r/”.

    For example:

    • r/AskReddit is for questions and answers.
    • r/science is for science news and discussion.
    • r/aww is for cute things.
    • r/personalfinance is for money advice.
    • r/gardening is for plants and garden talk.

    Your Reddit Wrapped often shows which subreddits shaped your year. This is where the recap can get funny. You may discover that your “main personality” was not travel, books, or fitness. It was frogs.

    Image not found in postmeta

    Can You Share Reddit Wrapped?

    Yes, usually. Reddit often gives users a final share card. You can save it or post it. Many people share it on Reddit itself. Others post it on other social platforms.

    Sharing is easy. But again, take a quick privacy check. Your Reddit habits can say a lot about you. That can be fun. It can also be a little too revealing.

    If you want to share safely, you can:

    • Crop out your username.
    • Hide communities you do not want public.
    • Share only the funniest slide.
    • Send it to friends instead of posting it publicly.

    Why Reddit Wrapped Matters

    Reddit Wrapped is not just a gimmick. It shows how online communities become part of our lives. A year on Reddit can include learning, laughing, venting, helping, and lurking. Especially lurking. Reddit has many silent readers.

    Your recap can remind you of questions you asked. It can show topics you explored. It can reveal hobbies you picked up. It can also expose how many hours you spent reading drama about people you have never met.

    That is the magic of Reddit. It is useful. It is chaotic. It is often hilarious. Reddit Wrapped captures a little slice of that chaos and turns it into a story.

    Final Thoughts

    Reddit Wrapped, or Reddit Recap, is a fun year-end summary of your Reddit life. It uses your account activity to show your top communities, posts, comments, karma, and interests. It is simple, colorful, and made to be shared.

    It can make you laugh. It can surprise you. It can also make you ask, “Why did I spend so much time in a subreddit about air fryers?”

    But that is the point. Reddit Wrapped is a playful snapshot of your internet year. It does not define you. It just shows where your curiosity took you. Sometimes that place is science. Sometimes it is memes. Sometimes it is a very long thread about the best way to store onions.

    And honestly, that is beautiful.