Blog

  • How Breckenridge Elevation Affects Skiing, Weather, and Altitude Sickness

    How Breckenridge Elevation Affects Skiing, Weather, and Altitude Sickness

    Few ski towns make elevation as much a part of the experience as Breckenridge, Colorado. Set high in the Rocky Mountains, Breckenridge is famous for deep winter snow, wide alpine bowls, crisp bluebird days, and a historic downtown that sits higher than many mountain summits elsewhere. But the same altitude that helps create unforgettable skiing can also shape the weather, affect your stamina, and make altitude sickness a real concern for visitors.

    TLDR: Breckenridge sits at a very high elevation, with the town around 9,600 feet and the ski resort reaching nearly 13,000 feet. This elevation helps produce excellent snow conditions and dramatic mountain weather, but it also means colder temperatures, stronger sun, and thinner air. Skiers should hydrate, pace themselves, protect their skin and eyes, and watch for symptoms of altitude sickness, especially during the first 24 to 48 hours.

    How High Is Breckenridge?

    Breckenridge is one of the highest major ski destinations in North America. The town itself sits at approximately 9,600 feet above sea level, while Breckenridge Ski Resort rises from a base elevation of about 9,600 feet to a summit elevation of nearly 12,998 feet at the top of Peak 8.

    That means even before you step into your skis, your body is already working in an environment with noticeably less oxygen than at sea level. At nearly 10,000 feet, the air pressure is lower, so each breath contains fewer oxygen molecules. You are still breathing the same percentage of oxygen, but your body receives less of it with every inhale.

    This elevation is a major reason Breckenridge feels so dramatic. The peaks seem enormous, the sky appears brilliantly blue, and the views stretch across ridgelines, high bowls, and snowy forests. However, it also means visitors need to approach skiing and outdoor activity with a little extra awareness.

    Image not found in postmeta

    Why Elevation Matters for Skiing

    Breckenridge’s elevation has a direct effect on the skiing experience. For many skiers and snowboarders, that effect is mostly positive. Higher elevations tend to be colder, and colder temperatures help preserve snow. This is one reason Breckenridge often has a long ski season, frequently stretching from early winter into spring.

    Snow quality is one of the biggest advantages. Because the resort reaches so high into the alpine zone, snow can remain light and dry, especially after storms. Powder days at Breckenridge can be excellent, particularly in the bowls and upper mountain terrain.

    Elevation also creates variety. Breckenridge is spread across multiple peaks, each with a different personality:

    • Peak 9 is known for beginner and intermediate terrain, making it a great place to adjust to the altitude.
    • Peak 8 offers access to iconic high alpine skiing and the Imperial Express SuperChair.
    • Peak 7 features long, rolling intermediate runs that are popular on sunny days.
    • Peak 6 includes expansive bowl terrain and wide-open alpine views.
    • Peak 10 is steeper and often favored by advanced skiers.

    However, skiing at high elevation can feel more physically demanding. You may notice that your legs burn faster, your breathing becomes heavier, or you need more breaks than usual. Even experienced skiers who are fit at lower elevations can feel surprisingly winded after a few runs.

    The key is to ski smarter, not harder. On your first day, consider starting with easier terrain, taking frequent rests, and avoiding the temptation to rush straight to the highest lift. The Imperial Express SuperChair, one of the highest chairlifts in North America, is spectacular, but it is best enjoyed when your body has had time to acclimate.

    How Elevation Shapes Breckenridge Weather

    Mountain weather is always changeable, and Breckenridge’s elevation makes that especially true. Conditions can shift quickly from calm sunshine to wind, snow, or low visibility. A day may begin with blue skies in town and turn into a snowy afternoon on the upper mountain.

    At higher elevations, temperatures are typically colder. As a general rule, air temperature drops as elevation increases, meaning the summit can be significantly colder than Main Street. Add wind, and the difference becomes even more noticeable. What feels comfortable at the base may feel harsh above treeline.

    Breckenridge also receives a significant amount of snowfall during the winter. Storms moving across the Rockies are lifted by the mountains, causing moisture to cool and fall as snow. This process, known as orographic lift, is one of the reasons high elevation ski areas can collect impressive snow totals.

    Still, high elevation does not always mean constant storms. Breckenridge is also known for clear, sunny days. The sunshine can be intense because there is less atmosphere above you to filter ultraviolet radiation. Snow reflects that sunlight, increasing exposure from below as well as above.

    Image not found in postmeta

    The Sun Is Stronger Than You Think

    One of the most underestimated effects of Breckenridge elevation is sun exposure. At high altitude, ultraviolet radiation is stronger, and snow reflection can intensify it further. Even on cold days, sunburn can happen quickly.

    To protect yourself, make these items part of your daily routine:

    • Sunscreen: Use a broad-spectrum sunscreen, ideally SPF 30 or higher, and reapply throughout the day.
    • Lip balm: Choose one with SPF protection, since lips can burn and crack easily in cold, dry air.
    • Goggles or sunglasses: UV protection is essential, especially on bright days above treeline.
    • Face covering: A neck gaiter or balaclava helps protect against wind, cold, and reflected sun.

    It is common for visitors to focus heavily on staying warm while forgetting that solar exposure is stronger than expected. In Breckenridge, you need protection from both winter cold and high-altitude sun.

    Understanding Altitude Sickness in Breckenridge

    Altitude sickness, also called acute mountain sickness, can occur when your body has difficulty adjusting to lower oxygen levels. Because Breckenridge sits around 9,600 feet, visitors arriving from low elevations may feel symptoms shortly after arrival or during their first day on the mountain.

    Common symptoms include:

    • Headache
    • Nausea or loss of appetite
    • Dizziness or lightheadedness
    • Fatigue or unusual weakness
    • Shortness of breath with mild activity
    • Trouble sleeping

    Many cases are mild and improve as the body acclimates. However, altitude sickness should be taken seriously. Symptoms that worsen, especially severe headache, confusion, persistent vomiting, chest tightness, or difficulty breathing at rest, require medical attention.

    It is important to know that altitude sickness does not only affect people who are out of shape. Fitness can help with skiing endurance, but it does not guarantee immunity from altitude-related symptoms. A marathon runner from sea level may still struggle on the first day in Breckenridge.

    How to Reduce Your Risk

    The best strategy is to give your body time to adapt. If possible, spend a night in Denver or another lower-elevation location before heading to Breckenridge. Denver is still high by most standards, at about 5,280 feet, but it can provide a helpful step between sea level and the high Rockies.

    Once you arrive, use the first day wisely. Instead of planning your most ambitious ski day immediately, consider a lighter schedule. Walk around town, rent gear, take a few easy runs, and get plenty of rest.

    Helpful altitude tips include:

    1. Hydrate early and often. High-altitude air is dry, and dehydration can make symptoms worse.
    2. Limit alcohol at first. Alcohol can affect sleep, hydration, and acclimatization.
    3. Eat balanced meals. Carbohydrates can be useful because they are easier for the body to convert into energy at altitude.
    4. Pace yourself. Take breaks before you feel exhausted.
    5. Sleep well. Rest is one of the best ways to help your body adjust.
    6. Listen to symptoms. Do not ignore a headache or dizziness just to keep skiing.

    Some travelers speak with a doctor before visiting high-altitude destinations, especially if they have a history of altitude sickness or medical conditions involving the heart or lungs. A healthcare provider may recommend preventive medication in certain cases.

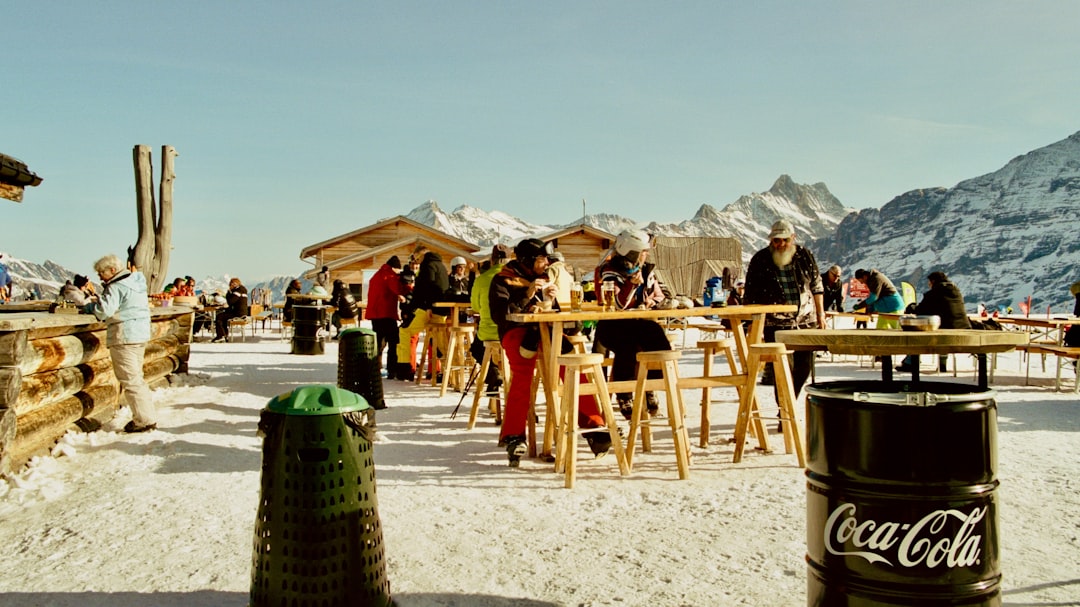
    Skiing Above Treeline

    One of Breckenridge’s signature features is its high alpine terrain. Above treeline, the scenery opens dramatically. Instead of skiing through forests, you glide across exposed bowls and ridges with panoramic views in every direction.

    This terrain is thrilling, but elevation makes it more demanding. Wind can be stronger, visibility can change fast, and temperatures can feel much colder. Snow conditions may vary from soft powder to wind-packed surfaces within a short distance.

    If you plan to ski the upper mountain, check the weather forecast and lift status before heading up. Wear layers that can handle wind and cold, and be prepared to descend if conditions deteriorate. High alpine skiing rewards patience and preparation.

    What to Wear at Breckenridge Elevation

    Layering is the best approach. Because temperatures can change throughout the day and between elevations, flexible clothing helps you stay comfortable.

    • Base layer: Choose moisture-wicking fabric, not cotton.
    • Mid layer: A fleece or insulated jacket provides warmth.
    • Outer layer: A waterproof and wind-resistant shell protects against snow and gusts.
    • Gloves or mittens: Bring warm options, and consider hand warmers on cold days.
    • Helmet and goggles: These protect against weather, sun, and impact.

    Because the air is dry, you may also want moisturizer, eye drops, and extra lip balm. Small comforts can make a big difference over several days in the mountains.

    Final Thoughts

    Breckenridge’s elevation is at the heart of what makes it such a memorable ski destination. It helps create reliable snow, long seasons, beautiful alpine terrain, and the crisp mountain atmosphere that visitors love. At the same time, it brings colder weather, stronger sun, thinner air, and the possibility of altitude sickness.

    The good news is that a little preparation goes a long way. If you hydrate, dress properly, protect yourself from the sun, and give your body time to adjust, you can enjoy Breckenridge with more comfort and confidence. Whether you are cruising groomers on Peak 7, exploring bowls on Peak 6, or simply strolling through the historic town, understanding the elevation helps you make the most of every moment in the high Rockies.

  • Best Shopify Theme Detector Tools for Advanced Ecommerce Analysis

    Best Shopify Theme Detector Tools for Advanced Ecommerce Analysis

    Behind every polished Shopify storefront is a stack of choices: theme architecture, app integrations, conversion features, performance tweaks, and visual branding. For ecommerce teams, agencies, developers, and competitive researchers, identifying those choices can reveal why a store feels fast, trustworthy, and persuasive. That is where Shopify theme detector tools become useful: they help uncover which theme a store is using, what apps may be installed, and how the storefront is technically structured.

    TLDR: Shopify theme detector tools help you identify the theme, apps, scripts, and technical patterns behind successful Shopify stores. The best tools go beyond simply naming a theme; they support competitive analysis, conversion research, performance auditing, and design inspiration. For advanced ecommerce analysis, combine multiple detectors with manual inspection so you can validate results and uncover deeper insights.

    Why Shopify Theme Detection Matters

    At first glance, a Shopify theme detector may seem like a simple curiosity tool. You paste in a store URL, click a button, and discover whether the site uses Dawn, Prestige, Impulse, Warehouse, or a custom theme. But for advanced ecommerce analysis, that surface-level answer is only the beginning.

    The right detector can help you answer practical business questions such as:

    • What design framework are top competitors using?
    • Which Shopify apps support their reviews, upsells, search, subscriptions, or loyalty programs?
    • Are they using a premium theme, a heavily customized theme, or a headless setup?
    • What patterns appear across high-converting stores in a niche?
    • How much of their experience comes from the theme versus third-party tools?

    For merchants, this information can guide theme selection and optimization. For agencies, it can improve discovery work before pitching redesigns or migrations. For developers, it can reveal implementation patterns worth studying. And for marketers, it can uncover the technology behind compelling product pages, bundles, cart drawers, and post-purchase flows.

    Image not found in postmeta

    What Makes a Good Shopify Theme Detector?

    Not all detector tools are equally useful. Some simply detect whether a store is built on Shopify. Others provide a theme name, theme ID, app list, hosting signals, tracking pixels, and performance-related hints. For advanced analysis, look for tools that provide more than a single result.

    A strong Shopify theme detector should offer:

    • Accurate theme identification: It should detect public theme names and identify when a store is likely using a custom or modified theme.
    • App and technology detection: The tool should reveal ecommerce apps, scripts, analytics platforms, review tools, search solutions, and personalization systems.
    • Fast URL scanning: Competitive research often involves reviewing dozens of stores, so speed matters.
    • Clear reporting: The output should be readable, organized, and easy to compare.
    • Verification clues: Helpful tools show evidence, such as theme metadata, script patterns, or app signatures.
    • Browser extension support: Extensions make it easy to inspect stores while browsing.

    Because Shopify stores are frequently customized, no detector is perfect. A theme may be renamed, code may be minified, apps may load conditionally, and custom storefronts may hide typical Shopify signatures. This is why serious analysts often combine automated tools with manual inspection.

    1. Shopify Theme Detector by ShopThemeDetector

    ShopThemeDetector is one of the more straightforward tools for identifying Shopify themes. It is designed around a simple workflow: enter a store URL and receive a likely theme name. For merchants who want quick inspiration or agencies doing initial research, this simplicity is useful.

    Best for: Quick theme checks and inspiration research.

    What it helps you learn:

    • The likely Shopify theme being used by a store
    • Whether the theme is recognizable or appears custom
    • Basic clues about the storefront setup

    Advanced analysis tip: Use this tool as a first pass, then compare the result against other detectors and the store’s source code. If a store appears to use a known premium theme, look at the product page layout, collection filters, cart behavior, and promotional sections to determine whether those features are native to the theme or added through apps.

    2. BuiltWith

    BuiltWith is not exclusively a Shopify theme detector, but it is one of the most useful technology profiling tools for ecommerce analysis. It can identify Shopify as the ecommerce platform and often reveals analytics tools, advertising pixels, customer support widgets, review systems, email marketing scripts, and other installed technologies.

    Best for: Full technology stack analysis.

    What it helps you learn:

    • Whether a store runs on Shopify
    • Installed marketing and analytics technologies
    • Tracking pixels and advertising platforms
    • Customer experience tools, such as chat, reviews, and email capture
    • Historical technology changes, depending on available data

    For advanced ecommerce analysis, BuiltWith is especially valuable because it helps separate theme-driven design from app-driven functionality. For example, a smooth product recommendation carousel may appear to be part of the theme, but the technology profile could reveal a personalization app. A sophisticated quiz funnel may look custom, but it might be powered by a third-party quiz platform.

    Advanced analysis tip: Use BuiltWith to build a competitor technology matrix. List five to ten competitors and compare their review apps, email platforms, loyalty tools, subscriptions, and analytics tags. Patterns often emerge quickly.

    3. Wappalyzer

    Wappalyzer is another popular technology detection tool with a browser extension and web-based lookup. It is widely used by developers, marketers, and researchers because it identifies frameworks, platforms, JavaScript libraries, ecommerce systems, analytics tools, and other web technologies.

    Best for: Fast in-browser technology detection.

    What it helps you learn:

    • Shopify platform usage
    • JavaScript frameworks and libraries
    • Marketing automation and analytics tools
    • Payment, conversion, and customer communication technologies

    Wappalyzer may not always provide the exact Shopify theme name, but it is excellent for understanding the broader technical environment. For advanced analysis, that context matters. A store using a lightweight theme with many third-party scripts may perform differently from a store using a feature-rich theme with fewer apps.

    Image not found in postmeta

    Advanced analysis tip: Install the browser extension and inspect multiple pages: homepage, collection page, product page, cart, and checkout where accessible. Some apps only appear on specific page types, so a single homepage scan may miss important technologies.

    4. Koala Inspector

    Koala Inspector is a browser extension built specifically for Shopify store analysis. It can help identify themes, apps, products, and other store insights. For ecommerce researchers, this Shopify-focused approach makes it more practical than general-purpose technology detectors in many situations.

    Best for: Shopify-specific competitive intelligence.

    What it helps you learn:

    • Theme information
    • Shopify apps used by a store
    • Product-related insights
    • Store structure and ecommerce signals

    Koala Inspector is particularly useful when you are evaluating stores in the same niche. For example, if you are analyzing beauty brands, pet supply stores, or apparel boutiques, you can compare their product page layouts, discount strategies, apps, and theme types while browsing naturally.

    Advanced analysis tip: Do not only record the detected theme. Record the commercial function of what you see. Is the store using sticky add-to-cart buttons? Bundles? Size guides? Back-in-stock alerts? Subscription widgets? These details are more useful than the theme name alone.

    5. Commerce Inspector

    Commerce Inspector is another ecommerce intelligence tool often used for Shopify research. It can provide insights into store technologies, product launches, best sellers, traffic signals, and apps, depending on the available data and plan level. It is more robust than a basic theme detector and is better suited for ongoing competitive monitoring.

    Best for: Product, app, and competitor tracking.

    What it helps you learn:

    • Shopify apps and technologies
    • Product catalog activity
    • Potential best-selling products
    • Competitive store changes over time

    For advanced analysis, Commerce Inspector can help connect technical choices to merchandising strategy. A competitor’s theme may explain the visual layout, but their product launch cadence, pricing strategy, and app ecosystem often explain much more about how the business operates.

    Advanced analysis tip: Track a competitor over several weeks rather than making conclusions from one snapshot. Ecommerce stores constantly test landing pages, bundles, discounts, and apps. Longitudinal observation gives you a more realistic view.

    6. Page Source and Developer Tools

    No automated detector should be your only source of truth. Browser developer tools are still one of the most reliable ways to validate findings. By viewing page source, inspecting network requests, and searching for common Shopify markers, you can often confirm whether a detector result makes sense.

    Best for: Manual verification and deeper technical analysis.

    What to look for:

    • Theme assets: CSS and JavaScript files may include theme-related names.
    • Shopify objects: Source code may include references to Shopify routes, sections, or storefront data.
    • App scripts: Many apps load scripts from recognizable domains.
    • Performance issues: Network waterfalls can show heavy scripts, large images, and slow third-party requests.
    • Structured data: Product schema can reveal how well the theme supports SEO.

    This method requires more technical knowledge, but it is invaluable. If a detector says a store uses a specific theme, developer tools can help you determine how heavily it has been customized. You may also discover that a store is using Shopify Plus with custom checkout elements, a headless frontend, or a theme that has been renamed.

    How to Use Theme Detectors for Advanced Ecommerce Analysis

    The most effective approach is to treat theme detection as part of a broader research workflow. A theme name is interesting, but the real value comes from understanding why a store experience works.

    Here is a practical workflow:

    1. Choose a competitor set: Select five to fifteen Shopify stores in your niche or adjacent markets.
    2. Detect the theme: Use a Shopify-specific detector to identify the likely theme.
    3. Scan the technology stack: Use tools such as BuiltWith or Wappalyzer to identify apps and scripts.
    4. Inspect key pages: Review the homepage, collection pages, product pages, cart, and content pages.
    5. Document conversion features: Note reviews, trust badges, sticky carts, bundles, subscriptions, filters, product recommendations, and urgency messages.
    6. Check performance: Use Lighthouse or PageSpeed Insights to evaluate speed, accessibility, and best practices.
    7. Separate theme from apps: Determine which features are native, custom-coded, or app-powered.
    8. Look for patterns: Identify repeated choices across successful stores.
    Image not found in postmeta

    Common Mistakes to Avoid

    Theme detection is powerful, but it can also lead to shallow conclusions if used incorrectly. Avoid these common mistakes:

    • Assuming the same theme guarantees the same results: A theme is only one part of performance. Copywriting, photography, offer quality, traffic source, pricing, and operations matter just as much.
    • Ignoring customization: Many successful Shopify stores use heavily modified themes. The detected theme may be only the foundation.
    • Overlooking app bloat: A beautiful store may rely on many scripts that slow it down. Always consider performance.
    • Copying without strategy: Use competitor insights for inspiration, not imitation. Your brand positioning and customers may require different choices.
    • Trusting one tool blindly: Cross-check results with multiple tools and manual inspection.

    What to Do After You Detect a Theme

    Once you know which theme a store uses, the next step is to evaluate whether the theme would actually fit your goals. A fashion brand, a single-product supplement store, and a large home goods catalog have very different needs.

    Ask these questions before making a decision:

    • Does the theme support your catalog size?
    • Are the collection filters strong enough for your products?
    • Does the product page support rich media, variants, bundles, or subscriptions?
    • Is the theme fast before adding apps?
    • How flexible are the sections and templates?
    • Does it support your brand style without excessive custom code?
    • Is it regularly updated by the developer?

    If a competitor uses a theme effectively, study the implementation rather than copying the choice. Look at their messaging hierarchy, image strategy, product education, reassurance elements, and checkout path. Often, the theme is simply the stage; the conversion strategy is the performance.

    Best Overall Tool Combination

    For advanced ecommerce analysis, the best setup is usually a combination of tools rather than a single detector. Use a Shopify-specific tool such as Koala Inspector or ShopThemeDetector for theme identification, then use BuiltWith or Wappalyzer for broader technology profiling. Finally, validate important findings with browser developer tools.

    A strong research stack might look like this:

    • Theme identification: ShopThemeDetector or Koala Inspector
    • Technology stack analysis: BuiltWith and Wappalyzer
    • Competitive ecommerce insights: Commerce Inspector
    • Manual verification: Chrome DevTools or another browser inspector
    • Performance review: Lighthouse or PageSpeed Insights

    This combination gives you a more complete view of how a Shopify store is built, how it converts visitors, and where it may have technical strengths or weaknesses.

    Final Thoughts

    Shopify theme detector tools are no longer just novelty utilities for finding a pretty storefront’s template. Used well, they are part of a serious ecommerce research process that connects design, technology, merchandising, and conversion strategy. They can reveal whether a store relies on a premium theme, custom development, specialized apps, or a carefully optimized mix of all three.

    The best analysts look beyond the theme name. They study how the theme supports the customer journey, how apps enhance or slow the experience, and how design choices align with the brand’s offer. With the right tools and a disciplined workflow, Shopify theme detection becomes a window into the strategic decisions behind successful ecommerce stores.

  • Best VPSRUS Hosting Services for Web Hosting and Deployment

    Best VPSRUS Hosting Services for Web Hosting and Deployment

    Choosing a hosting service can feel like picking a spaceship. There are many buttons. There are strange words. There are prices that look tiny until you add extras. VPSRUS hosting services can be a smart path if you want more power than shared hosting, but less stress than running a huge server farm.

    TLDR: VPSRUS hosting is a good fit for websites, apps, stores, and deployment projects that need speed, control, and room to grow. The best choice is usually a VPS plan with enough CPU, RAM, SSD storage, backups, and support. Pick Linux if you want flexibility and lower cost. Pick managed help if you want to spend more time building and less time fixing server goblins.

    What VPS Hosting Means

    A VPS is a Virtual Private Server. That sounds fancy. It is not too complex.

    Think of one large physical server as an apartment building. Shared hosting is like renting one couch in a crowded room. A VPS is like renting your own apartment. You still share the building, but your space is private.

    You get your own resources. You get more control. You can install the tools you need. Your website can run faster. Your app can behave better. Your deployment process can become smoother.

    This is why many developers, small businesses, bloggers, agencies, and online stores like VPS hosting. It gives you freedom. It does not force you to buy a whole dedicated server.

    Image not found in postmeta

    Why VPSRUS Can Be Useful for Web Hosting

    VPSRUS hosting services are useful when your site has grown past the “tiny website” stage. Maybe your blog now has lots of readers. Maybe your shop gets real orders. Maybe your app is no longer just a weekend idea.

    At that point, shared hosting can feel slow. It can also feel limited. You may not be able to install special software. You may not be able to tune the server. You may not get enough power during traffic spikes.

    A VPS gives you a better toolbox. You can host websites, APIs, dashboards, databases, bots, staging sites, and more. It is like moving from a toy kitchen to a real kitchen. Now you can cook the big stuff.

    Best VPSRUS Hosting Services to Look For

    Not every VPS plan is the same. Some are tiny and cheap. Some are powerful and ready for heavy work. The best VPSRUS hosting service depends on your project.

    Here are the main types to consider.

    1. Linux VPS Hosting

    Linux VPS hosting is the classic choice. It is popular with developers. It works well with websites, apps, and open source tools.

    You can run stacks like:

    • LEMP: Linux, Nginx, MySQL or MariaDB, PHP.
    • LAMP: Linux, Apache, MySQL or MariaDB, PHP.
    • Node.js apps with Nginx as a reverse proxy.
    • Python apps with Gunicorn or Uvicorn.
    • Docker containers for clean deployments.

    Linux VPS plans are often cost friendly. They are also flexible. If you like control, this is a strong choice.

    2. Windows VPS Hosting

    Windows VPS hosting is good for projects that need Microsoft tools. Some teams rely on Windows Server, ASP.NET, MS SQL, or remote desktop workflows.

    It can be easier for users who prefer a visual interface. You can log in with Remote Desktop. You can manage things with familiar menus.

    Windows VPS hosting can cost more due to licensing. But it may be worth it if your app needs that environment.

    3. Managed VPS Hosting

    A managed VPS is great if you do not want to be the server mechanic.

    With managed hosting, the provider may help with updates, security, monitoring, setup, and fixes. The exact help can vary. Always check the details.

    Managed VPS hosting is best for:

    • Business owners who do not want server headaches.
    • Agencies that need stable client sites.
    • Online shops that cannot afford downtime.
    • Developers who want to focus on code.

    It costs more than unmanaged hosting. But it can save time. And time is money. Also snacks. Time is snacks.

    4. Unmanaged VPS Hosting

    An unmanaged VPS gives you more responsibility. You manage the server yourself. You install updates. You secure it. You fix issues.

    This is great for experienced users. It is also good for learning. But it can bite if you ignore security.

    If you choose unmanaged VPS hosting, be ready to handle:

    • Firewalls.
    • SSH keys.
    • Software updates.
    • Backups.
    • Monitoring.
    • Web server setup.

    If that list makes you smile, go for it. If it makes you sweat, consider managed hosting.

    Features That Matter Most

    The best VPSRUS hosting plan is not always the biggest plan. It is the plan that fits your real needs. Do not buy a rocket if you only need a bicycle.

    CPU Power

    The CPU is the brain of your server. More CPU helps with busy websites, scripts, builds, and app logic.

    If your site is simple, you can start small. If you run an online store, heavy app, or API, choose more CPU.

    RAM

    RAM is short term memory. Your server uses it to keep things running smoothly.

    WordPress can run on modest RAM. But add plugins, traffic, and a database, and it may need more. Docker and modern app stacks also like extra RAM.

    SSD or NVMe Storage

    Fast storage is a big deal. SSD and NVMe drives help pages load faster. They also help databases respond quickly.

    If a plan offers modern fast storage, that is a plus. Slow disks can make a good server feel sleepy.

    Bandwidth

    Bandwidth is the amount of data your server can send. Images, videos, downloads, and traffic all use it.

    If your site has many visitors, check the bandwidth limit. Also check what happens if you pass it. Nobody likes surprise bills. Surprise cake is better.

    Backups

    Backups are not optional. They are your safety net. Websites break. Updates fail. Humans click wrong buttons. It happens.

    Look for easy backup options. Daily backups are great. Offsite backups are even better. Test restore steps before disaster day.

    Image not found in postmeta

    Best VPSRUS Hosting for WordPress

    WordPress is everywhere. It powers blogs, business sites, portfolios, and shops. A VPS can make WordPress faster and safer when set up well.

    For WordPress hosting, look for:

    • At least 2 GB RAM for small to medium sites.
    • Fast SSD or NVMe storage.
    • Good backups.
    • SSL support.
    • Caching tools.
    • Strong security settings.

    You can use Nginx or Apache. You can add a caching plugin. You can use a CDN for global visitors. This makes your site feel quick, even when traffic grows.

    Best VPSRUS Hosting for Developers

    Developers need freedom. A VPS gives that freedom. You can deploy code your way. You can set up Git. You can run Docker. You can test new stacks without asking permission.

    A developer friendly VPS should offer:

    • Root access.
    • Choice of operating system.
    • Clear control panel.
    • Easy reinstall options.
    • IPv4 and possibly IPv6 support.
    • Low latency to your users.

    For deployment, keep things simple. Use Git for code. Use environment files for secrets. Use a process manager like PM2 or systemd. Use Nginx as a traffic gatekeeper. Use SSL for every public site.

    If you deploy often, try a basic CI/CD pipeline. It can pull code, run tests, build your app, and restart services. It feels magical. It is not magic. But it is close.

    Best VPSRUS Hosting for Online Stores

    Online stores need speed and trust. A slow store loses buyers. A broken checkout loses money. A secure store helps people feel safe.

    For ecommerce, choose a stronger VPS plan. Do not go too tiny. Your store may need more CPU and RAM during sales, holidays, or ad campaigns.

    Important store features include:

    • SSL certificates for secure payments.
    • Reliable uptime.
    • Regular backups.
    • Fast database performance.
    • Monitoring for crashes and downtime.
    • Security hardening.

    If your shop uses WooCommerce, Magento, OpenCart, or PrestaShop, a VPS can help. But tune it well. Databases love attention. Give them memory, indexes, and care.

    Security Basics for VPSRUS Hosting

    A VPS is powerful. But power needs care. Security is not scary if you follow the basics.

    Start with these steps:

    1. Use strong passwords or, better, SSH keys.
    2. Disable root login when possible.
    3. Turn on a firewall.
    4. Keep the system updated.
    5. Install only what you need.
    6. Use SSL certificates.
    7. Set up automatic backups.
    8. Monitor logs for strange activity.

    Also use separate users for different tasks. Do not run everything as root. Root is powerful. Root is also dangerous when sleepy.

    Performance Tips for Better Hosting

    A VPS can be fast. But you still need good habits. Think of it like a sports car. It works better with clean fuel and good tires.

    Try these simple performance tips:

    • Use a modern PHP version for PHP sites.
    • Enable caching.
    • Compress images.
    • Use a CDN for global traffic.
    • Clean old logs and unused files.
    • Optimize your database.
    • Watch CPU, RAM, and disk usage.

    A faster site makes users happy. It can also help search performance. People stay longer when pages load quickly.

    Image not found in postmeta

    How to Choose the Best VPSRUS Plan

    Start with your project size. Then choose a plan that gives you some growing room. Do not buy the smallest plan if your site already gets steady traffic.

    Use this simple guide:

    • Small blog or portfolio: Start with a basic Linux VPS.
    • Business website: Choose more RAM and reliable backups.
    • WordPress with plugins: Pick SSD storage and extra memory.
    • Online store: Choose stronger CPU, more RAM, and managed help if needed.
    • Developer app: Choose root access, Linux, and easy deployment tools.
    • Client agency sites: Consider managed VPS for peace of mind.

    Also think about server location. Pick a location close to your main audience when possible. Lower latency means pages respond faster.

    Deployment Made Simple

    Deployment means moving your project from your computer to the server. It sounds big. It can be simple.

    A clean deployment flow may look like this:

    1. Write code on your computer.
    2. Push code to Git.
    3. Pull code on the VPS.
    4. Install dependencies.
    5. Build the project.
    6. Restart the app.
    7. Check logs.

    For even smoother deployments, use scripts. A simple script can save many clicks. Fewer clicks means fewer mistakes. Fewer mistakes means fewer dramatic sighs.

    Docker is also useful. It lets you package your app with its tools. This can make deployments cleaner and more repeatable.

    Final Thoughts

    VPSRUS hosting services can be a strong choice for web hosting and deployment when you need control, speed, and flexibility. The best service depends on your skill level and your project.

    Choose Linux VPS for flexibility. Choose Windows VPS for Microsoft based projects. Choose managed VPS if you want help. Choose unmanaged VPS if you like full control.

    Keep backups. Use security basics. Monitor performance. Start with a plan that fits today, but leaves room for tomorrow.

    Hosting does not need to feel like a dragon cave. With the right VPSRUS plan, it can feel like a clean workshop. Your tools are ready. Your site is fast. Your app is live. And the server goblins are mostly quiet.

  • What Are the Security Issues With BetterDiscord and Third-Party Plugins

    What Are the Security Issues With BetterDiscord and Third-Party Plugins

    BetterDiscord is popular because it lets people customize Discord far beyond the official settings: themes, visual tweaks, interface changes, automation features, and community-made plugins that can make the app feel more personal. But that flexibility comes with a serious tradeoff. When you install unofficial client modifications and third-party plugins, you are placing extra code inside an app that handles private messages, friend lists, servers, voice activity, and sometimes sensitive account information.

    TLDR: BetterDiscord and third-party plugins can create security risks because they run unofficial code inside your Discord client. Malicious or poorly written plugins may steal data, expose your account token, track activity, or break after updates. If you choose to use them, download only from trusted sources, review permissions and code when possible, keep backups, and understand that using modified clients may violate Discord’s Terms of Service.

    Why BetterDiscord Raises Security Questions

    BetterDiscord is not malware by itself. Many users install it simply to change how Discord looks or to add quality-of-life features. The problem is not necessarily the BetterDiscord platform alone, but the broader ecosystem surrounding it: unofficial plugins, custom themes, shared scripts, and third-party downloads.

    Discord’s official client is designed, maintained, and updated by Discord. BetterDiscord modifies that client and allows additional code to run within it. That means plugins may interact with the same environment where your messages, server information, and account session exist. In security terms, this increases the attack surface: there are more places where something can go wrong.

    Most users do not read plugin code before installing it. They see a useful feature, click download, place the file into a folder, and restart Discord. That convenience is exactly what attackers like. A plugin that claims to add a harmless feature could also contain hidden code designed to collect information, redirect requests, or download more malicious scripts later.

    Image not found in postmeta

    The Biggest Risk: Account Token Theft

    One of the most serious security issues with unofficial Discord modifications is token theft. A Discord token is a session credential that can allow access to an account without needing the password or two-factor authentication each time. If an attacker obtains a valid token, they may be able to impersonate the user, read private messages, join servers, send spam, or attempt scams using that account.

    Malicious plugins can be written to search for session information, intercept data, or send sensitive details to an external server. Because the plugin runs locally inside the modified client environment, it may have access to information that ordinary websites would not. This makes plugin security especially important.

    Even worse, token theft can be quiet. You may not notice anything immediately. Your Discord may continue working normally while the stolen data is sent elsewhere. By the time suspicious messages appear, servers are spammed, or your account is locked, the damage may already be done.

    Malicious Plugins and Hidden Behavior

    Not every dangerous plugin looks suspicious. Some are designed to appear useful, polished, and popular. A plugin might offer message filters, custom notifications, profile enhancements, or interface shortcuts while also including hidden behavior.

    Common malicious actions may include:

    • Stealing account tokens or session data.
    • Logging private messages or monitoring conversations.
    • Sending server and friend list information to outside servers.
    • Downloading additional code after installation.
    • Injecting advertisements, scams, or phishing links into messages.
    • Changing settings without clear permission.

    The danger is amplified by the fact that plugins can be copied, modified, and reuploaded. A legitimate plugin may exist in one repository, while a malicious version with the same name is distributed elsewhere. Users who download from random links in chats, video descriptions, or file-sharing sites may unknowingly install a tampered version.

    Privacy Problems Beyond Malware

    Security risks are not limited to outright malware. Some plugins may create privacy concerns even if they are not intentionally malicious. For example, a plugin might collect usage analytics, check remote servers for updates, or communicate with external APIs. If this behavior is not clearly disclosed, users may not realize what information is being shared.

    Discord usage can reveal a lot: what communities you belong to, when you are active, who you talk to, what games you play, and which channels you visit. A plugin that collects metadata about your activity could create a detailed profile of your habits. In some cases, that information may be more sensitive than it appears.

    There is also the question of data storage. If a plugin developer collects logs, crash reports, or user statistics, where is that data stored? Is it encrypted? Who can access it? How long is it kept? Unofficial plugin developers may not have formal privacy policies, secure infrastructure, or incident response procedures.

    Supply Chain Risks: Trusting the Whole Chain

    When you install a plugin, you are not only trusting the developer. You are also trusting every dependency, update server, repository, and distribution method involved. This is known as a supply chain risk.

    A plugin may start out safe and later become compromised. A developer’s account could be hacked. A hosting platform could be abused. An update mechanism could be modified to serve malicious code. A once-trusted project could be sold or abandoned, then taken over by someone with bad intentions.

    This matters because many users assume that if a plugin was safe when they first installed it, it will remain safe forever. That is not always true. Software security is ongoing. Updates can fix vulnerabilities, but they can also introduce new ones.

    Image not found in postmeta

    Lack of Official Review and Sandboxing

    Official app stores and extension marketplaces usually have some level of review, automated scanning, permission controls, and removal processes. These systems are not perfect, but they create barriers. Third-party Discord plugin ecosystems are much looser.

    BetterDiscord plugins generally do not operate inside a strict permission model like modern browser extensions. A browser extension may ask to read data on certain websites or access tabs. A plugin in a modified Discord client may not present such clear, user-friendly permission prompts. This makes it harder for ordinary users to understand what a plugin can actually do.

    Another issue is sandboxing. Sandboxing is a security technique that limits what code can access. If untrusted code is tightly sandboxed, it has fewer opportunities to harm the system or steal data. Unofficial client plugins may not have the same protective boundaries users expect from official app ecosystems.

    Compatibility Issues Can Become Security Issues

    Discord updates frequently. When its internal structure changes, BetterDiscord or individual plugins may break. At first, this sounds like a convenience problem: buttons stop working, menus disappear, or themes look wrong. But compatibility issues can become security issues too.

    Broken plugins may behave unpredictably. They may expose errors, interfere with settings, disable safety features, or create crashes that users try to fix by downloading unofficial patches from random sources. Attackers often take advantage of moments when users are frustrated and looking for a quick fix.

    A common pattern is simple: a Discord update breaks a popular plugin, users search online for a working version, and malicious websites offer “fixed” downloads. These fake fixes may contain credential stealers or other malware. The more urgently someone wants their setup restored, the less carefully they may inspect the source.

    Terms of Service and Account Risk

    Another important issue is that using client modifications may violate Discord’s Terms of Service. Discord has historically discouraged modified clients because they can interfere with platform security, user experience, and abuse prevention. While enforcement may vary, users should understand that unofficial modifications could put their account at risk.

    This is separate from malware risk. Even if every plugin you use is safe, the use of a modified client may still be against platform rules. For some people, especially community managers, business users, creators, or anyone who depends on their Discord account, that policy risk may be enough reason to avoid BetterDiscord entirely.

    How to Reduce the Risks If You Use BetterDiscord

    The safest choice is to avoid unofficial client modifications. However, if you decide to use BetterDiscord anyway, there are practical steps that can reduce your exposure.

    • Download only from reputable sources. Avoid random links, reuploads, shortened URLs, and files shared through direct messages.
    • Use fewer plugins. Every plugin adds another potential point of failure. Install only what you truly need.
    • Check the developer’s reputation. Look for open-source projects, active maintenance, community discussion, and transparent issue tracking.
    • Review code when possible. If you cannot read JavaScript, look for community reviews or comments from people who can.
    • Avoid plugins that request suspicious behavior. Be cautious of anything involving tokens, self-botting, mass messaging, account automation, or hidden logging.
    • Keep your system protected. Use updated antivirus software, a modern operating system, and secure browser habits.
    • Enable two-factor authentication. While 2FA may not fully protect against token theft, it still helps protect your account from password-based attacks.
    • Remove abandoned plugins. If a plugin has not been updated in a long time, consider uninstalling it.
    • Watch for unusual account activity. Unexpected messages, server joins, setting changes, or login warnings should be treated seriously.

    If you suspect your account has been compromised, change your password immediately, log out of all sessions if possible, remove suspicious plugins, scan your device, and contact Discord support. Changing the password can invalidate existing tokens, which is important if token theft is suspected.

    Red Flags to Watch For

    Some warning signs should make you pause before installing a plugin. A plugin may be risky if it is distributed only through a private message, requires you to disable security tools, has no visible source code, promises features that seem too powerful, or claims it can unlock paid features for free.

    Be especially suspicious of plugins that advertise account automation, mass messaging, server raiding tools, hidden user tracking, or ways to bypass Discord limits. These are not just security risks; they may also be associated with abuse and policy violations.

    Image not found in postmeta

    Are Themes Safer Than Plugins?

    Themes are often viewed as safer because they are mostly visual. A theme typically changes colors, fonts, spacing, backgrounds, and layout. In many cases, a theme is less powerful than a plugin and therefore less risky.

    However, themes are not automatically safe. Some themes can import remote resources, load external files, or include code-like behavior depending on how they are built and processed. A theme that pulls assets from an external server may reveal your IP address to that server or allow the theme’s appearance to change later without you realizing it.

    In general, plugins deserve more caution than themes, but both should be treated as untrusted third-party content until verified.

    The Convenience Versus Security Tradeoff

    BetterDiscord exists because users want more control over their experience. That desire is understandable. Many official apps limit customization, and communities often build creative solutions that platforms do not provide. Some BetterDiscord plugins are genuinely useful, clever, and carefully maintained.

    Still, security is about tradeoffs. The more unofficial code you add to a communication app, the more trust you place in strangers. That trust may be reasonable in some cases, but it should never be blind. A beautiful theme or convenient plugin is not worth losing access to your account, exposing private conversations, or putting your communities at risk.

    Final Thoughts

    BetterDiscord and third-party plugins can make Discord feel more powerful and personal, but they also introduce meaningful security and privacy concerns. The main risks include token theft, malicious code, data collection, weak review processes, supply chain attacks, compatibility problems, and possible Terms of Service violations.

    If security matters most, the best approach is to avoid modified clients and stick with official Discord features. If you choose to use BetterDiscord, treat every plugin like software from an unknown publisher: verify the source, install sparingly, monitor updates, and remove anything you do not fully trust. Customization can be fun, but with unofficial plugins, caution is not optional—it is part of the cost of control.

  • Best Safe Movie Streaming Alternatives to LosMovies

    Best Safe Movie Streaming Alternatives to LosMovies

    For viewers who once relied on LosMovies, the search for a safer and more reliable streaming option has become more important than ever. Unofficial movie sites often carry risks such as intrusive ads, malware, broken links, poor video quality, and potential copyright concerns. Fortunately, there are many safe movie streaming alternatives that provide legal access to films, documentaries, TV shows, and family entertainment without the uncertainty associated with questionable platforms.

    TLDR: The best safe alternatives to LosMovies include legal streaming services such as Tubi, Pluto TV, Crackle, Peacock, Netflix, Hulu, Amazon Prime Video, Disney Plus, Max, Kanopy, Hoopla, and The Roku Channel. Free ad-supported platforms are ideal for budget-conscious viewers, while paid services offer newer releases, exclusives, and premium features. Safer streaming means using licensed platforms, avoiding suspicious pop-ups, and choosing services with clear privacy and security practices.

    Why Viewers Look for LosMovies Alternatives

    LosMovies became known as a destination for free access to films and television shows, but sites of that kind often operate in legally uncertain territory. They may not have proper licensing agreements, and that creates problems for both content creators and viewers. In many cases, these platforms are filled with aggressive advertisements, misleading download buttons, fake media players, and links that redirect users to unsafe pages.

    A safe alternative should offer licensed content, transparent ownership, secure browsing, and a predictable viewing experience. The best services also provide apps for smart TVs, mobile devices, streaming sticks, and web browsers. For many households, the right replacement for LosMovies is not one single site, but a combination of free and paid platforms that cover different entertainment needs.

    Image not found in postmeta

    What Makes a Streaming Service Safe?

    A streaming platform can be considered safe when it is legitimate, secure, and respectful of user privacy. Legal services obtain distribution rights for the movies and shows they offer. This reduces the risk of takedowns, low-quality copies, or hidden malicious scripts.

    • Licensed content: The service has permission to stream its library.
    • Secure website and apps: Trusted platforms use encrypted connections and verified app stores.
    • Clear business model: Revenue usually comes from subscriptions, ads, rentals, or library partnerships.
    • Minimal security risks: Legal platforms do not rely on suspicious pop-ups or forced downloads.
    • Device support: Quality services work on popular devices such as Roku, Fire TV, Apple TV, Android, iOS, and smart TVs.

    Best Free Safe Alternatives to LosMovies

    1. Tubi

    Tubi is one of the strongest free alternatives for viewers who want a large content library without paying a subscription fee. It is an ad-supported platform with thousands of movies and shows across genres such as action, comedy, horror, romance, documentaries, anime, and family entertainment.

    The service is legal, widely available, and owned by Fox Corporation. Its catalog changes regularly, which helps keep the viewing experience fresh. While Tubi does include ads, they are generally more predictable and safer than the pop-ups found on unofficial streaming sites. For viewers seeking a free LosMovies replacement, Tubi is often one of the first platforms worth considering.

    2. Pluto TV

    Pluto TV combines on-demand streaming with live TV-style channels. It is especially useful for viewers who enjoy browsing scheduled programming rather than choosing a specific movie every time. The platform includes movie channels, classic TV, crime shows, news, comedy, reality programs, and niche entertainment categories.

    Because Pluto TV is free and supported by ads, it offers a familiar television-like experience without requiring cable. Its live channel format makes it a good option for casual viewing, while the on-demand section provides access to selected films and series.

    3. Crackle

    Crackle is another long-running free streaming service that offers a rotating library of films and television shows. Its selection may not be as large as some competitors, but it often includes recognizable titles, cult favorites, and original programming.

    Crackle is a safer choice than unofficial movie sites because it operates through licensing agreements and displays standard ads rather than risky pop-ups. It is suitable for viewers who enjoy discovering older films, thrillers, comedies, and lesser-known releases.

    4. The Roku Channel

    The Roku Channel is not limited to Roku devices. It is also available through web browsers and apps in supported regions. The service provides free ad-supported movies, TV shows, live channels, and select premium subscription add-ons.

    Its clean interface and reputable backing make it a strong safe alternative. Viewers who already use Roku hardware may find it especially convenient, as the channel is integrated directly into the Roku ecosystem.

    5. Freevee

    Amazon Freevee is a free, ad-supported streaming service from Amazon. It offers movies, television series, and original content without requiring a paid Prime membership. Since it belongs to a major technology and entertainment company, it provides a safer and more stable experience than unofficial free streaming sites.

    Freevee is particularly valuable for viewers who want recognizable titles and a polished app experience. Its ad breaks are part of the legal viewing model, making it a practical option for those who prefer not to pay monthly fees.

    Best Paid Safe Alternatives to LosMovies

    6. Netflix

    Netflix remains one of the most popular paid streaming platforms in the world. It is known for original films, international series, documentaries, stand-up specials, animation, and a diverse catalog of licensed content. Although its library differs by region, Netflix continues to be a convenient choice for viewers who want a broad selection in one place.

    Netflix is safer than unauthorized streaming sites because it offers official apps, secure payment processing, parental controls, subtitles, multiple profiles, and high-quality video playback. It is a premium option for users who value reliability and polished recommendations.

    Image not found in postmeta

    7. Hulu

    Hulu is a strong choice for viewers who enjoy television series, current-season episodes, original dramas, comedies, documentaries, and films. In the United States, it is particularly popular among audiences who want access to network TV content shortly after broadcast.

    Hulu offers different plans, including ad-supported and ad-free options. Some bundles also include Disney Plus and ESPN Plus, making Hulu part of a larger entertainment package. For households replacing LosMovies, Hulu provides a legal and reliable library with strong TV coverage.

    8. Amazon Prime Video

    Amazon Prime Video offers a mix of included content, rentals, purchases, premium channels, and original productions. It is available as part of an Amazon Prime membership or as a standalone service in some regions.

    Its biggest advantage is flexibility. Viewers can stream included titles, rent newer releases, or subscribe to add-on channels. This makes Prime Video a useful alternative for people who want both subscription entertainment and occasional access to recent films.

    9. Disney Plus

    Disney Plus is ideal for families and fans of major franchises. Its catalog includes Disney classics, Pixar films, Marvel titles, Star Wars content, National Geographic documentaries, and selected mature content in certain regions through integrated hubs.

    The platform is a safe, polished, and family-friendly alternative to LosMovies. It offers parental controls, high-quality streams, and official access to popular franchise content that is often targeted by piracy sites.

    10. Max

    Max, previously associated with HBO Max branding in many markets, is a premium service known for acclaimed series, blockbuster films, documentaries, animation, and prestige programming. It is a strong option for viewers who prioritize quality over quantity.

    Max includes content from HBO, Warner Bros., Discovery networks, and related brands depending on the region and plan. For movie lovers, it can be an excellent paid alternative with a strong selection of dramas, classics, comedies, and major studio releases.

    Best Library-Based and Educational Alternatives

    11. Kanopy

    Kanopy is one of the best legal streaming options for viewers with a library card or university login. It focuses on thoughtful cinema, documentaries, independent films, classic movies, foreign-language titles, and educational content.

    Unlike many free streaming platforms, Kanopy is usually ad-free because access is funded through participating libraries and institutions. It is especially valuable for students, film enthusiasts, and viewers who prefer critically acclaimed material.

    12. Hoopla

    Hoopla is another library-supported platform that offers movies, TV shows, audiobooks, ebooks, music, and comics. Access depends on whether a local library participates in the service. When available, it provides a safe and legal way to borrow digital entertainment.

    Hoopla works well for families and casual viewers because it includes a varied catalog. Borrowing limits may apply, but the platform remains one of the most trustworthy free alternatives to questionable streaming sites.

    How to Choose the Right LosMovies Alternative

    The best alternative depends on viewing habits, budget, device preferences, and preferred genres. A viewer who mainly wants free movies may benefit from combining Tubi, Pluto TV, The Roku Channel, and Freevee. A family may prefer Disney Plus or a bundle with Hulu. A fan of prestige television may choose Max, while a documentary lover may find Kanopy more satisfying.

    It is also useful to consider how often the platform updates its library. Some services rotate titles monthly, while others focus on original programming. Device compatibility is another important factor. A service should work smoothly on the viewer’s preferred screen, whether that is a smart TV, laptop, tablet, smartphone, or streaming stick.

    Safety Tips for Streaming Movies Online

    Even when a platform appears professional, viewers should take basic precautions. Safe streaming begins with choosing official websites and downloading apps only from trusted stores such as Google Play, the Apple App Store, Roku Channel Store, Amazon Appstore, or a smart TV’s built-in app marketplace.

    • Avoid unknown streaming mirrors: Copycat sites may use familiar names to trick visitors.
    • Do not install random video players: Legal services rarely require unusual browser extensions or executable files.
    • Check the web address: Misspellings and strange domains can indicate unsafe websites.
    • Use strong passwords: Paid streaming accounts should have unique passwords and two-factor authentication when available.
    • Be cautious with pop-ups: Claims about prizes, virus warnings, or required downloads should be treated as suspicious.
    • Review privacy settings: Reputable services allow account and viewing preference management.
    Image not found in postmeta

    Free vs. Paid Streaming: Which Is Better?

    Free streaming services are best for viewers who want legal entertainment without monthly costs. Their main trade-off is advertising, and their catalogs may not always include the newest releases. Still, platforms such as Tubi, Pluto TV, Freevee, and The Roku Channel provide impressive value.

    Paid services are better for viewers who want exclusive shows, newer movies, fewer ads, offline downloads, higher resolutions, and more consistent quality. Netflix, Hulu, Prime Video, Disney Plus, and Max each serve different audiences. Many households use a rotating subscription strategy, keeping one or two paid services at a time and switching when new content becomes available.

    Final Thoughts

    LosMovies may have attracted viewers with free access, but safer and more reliable choices are widely available. Legal streaming platforms protect viewers from many common risks associated with unofficial sites, including malware, unstable links, poor-quality copies, and privacy concerns. The best approach is to build a personal streaming mix that includes a few free ad-supported services and, when the budget allows, one or two premium subscriptions.

    For most viewers, the strongest safe alternatives include Tubi for free movies, Pluto TV for live-style channels, Freevee for ad-supported mainstream titles, Netflix for originals, Disney Plus for families, Max for premium programming, and Kanopy or Hoopla for library-based access. Together, these services provide a safer, more ethical, and more enjoyable way to stream movies online.

    FAQ

    Is LosMovies safe to use?

    LosMovies and similar unofficial streaming sites may expose visitors to unsafe ads, redirects, malware risks, and copyright concerns. Safer options are legal platforms with licensed content and verified apps.

    What is the best free alternative to LosMovies?

    Tubi is one of the best free alternatives because it offers a large legal library of movies and shows. Pluto TV, Freevee, Crackle, and The Roku Channel are also strong choices.

    Are free legal streaming services really free?

    Yes. Services such as Tubi, Pluto TV, Freevee, and The Roku Channel are free because they show advertisements. Viewers do not need to use illegal sites to watch free movies legally.

    Which paid streaming service is best for movies?

    The best paid service depends on taste. Netflix offers broad variety, Prime Video provides rentals and included titles, Disney Plus is best for family and franchise content, and Max is strong for premium films and series.

    Can library cards provide free movie streaming?

    Yes. Platforms such as Kanopy and Hoopla allow eligible library members to stream movies and shows legally. Availability depends on the local library system.

    How can viewers avoid unsafe streaming websites?

    Viewers should use official websites, install apps only from trusted app stores, avoid suspicious pop-ups, never download unknown video players, and choose services with clear licensing and privacy policies.

  • Top 10 3D Product Configurator Plugins for WordPress and WooCommerce

    Top 10 3D Product Configurator Plugins for WordPress and WooCommerce

    Modern ecommerce buyers increasingly expect to inspect, personalize, and validate products before they purchase. For stores selling furniture, jewelry, apparel, bikes, machinery, packaging, or made to order goods, a 3D product configurator can reduce uncertainty and give customers a more confident buying experience. In WordPress and WooCommerce, the best solution is not always a simple plugin; many serious 3D configurators combine a WordPress connector with a cloud rendering platform, product rules engine, and 3D asset workflow.

    TLDR: If you want a serious 3D product configurator for WooCommerce, start by evaluating Zakeke, Expivi, Angle 3D Configurator, Verge3D, and Threekit. For stores needing simpler visual customization, tools like Fancy Product Designer, Kickflip, and WP Configurator may be more practical. The right choice depends on product complexity, 3D model quality, pricing rules, mobile performance, and how deeply the configurator must connect with WooCommerce variations, inventory, and checkout.

    What to Look for in a 3D Product Configurator

    Before choosing a plugin, it is important to define what “3D configurator” means for your business. Some tools provide true real time 3D visualization, while others focus on 2D previews, layered images, or augmented reality. A trustworthy implementation should support accurate product options, clear pricing logic, mobile friendly performance, and a clean buying path from configuration to cart.

    • WooCommerce compatibility: The configurator should pass selected options, price changes, and order details into WooCommerce reliably.
    • 3D asset support: Look for support for formats such as GLB, glTF, OBJ, FBX, or platform specific optimized models.
    • Rules and dependencies: Serious products often need conditional logic, incompatible option rules, measurements, or material constraints.
    • Performance: A beautiful configurator is not useful if it loads slowly on mobile devices.
    • Scalability: Consider whether the tool can handle hundreds or thousands of SKUs, materials, and product combinations.
    Image not found in postmeta

    Top 10 3D Product Configurator Plugins and Integrations

    1. Zakeke

      Zakeke is one of the most established product customization platforms available for WooCommerce. It supports visual product personalization, 3D configuration, augmented reality, and print ready files, depending on the plan and implementation. It is commonly used for apparel, promotional products, packaging, shoes, accessories, and customizable merchandise.

      The main advantage of Zakeke is that it offers a broad commercial feature set rather than a narrow 3D viewer. Store owners can configure product options, allow customers to add text or images, preview designs, and send structured customization data into WooCommerce orders. For businesses that need both visual customization and ecommerce workflow support, it is a strong candidate.

      Best for: stores that need a mature customization platform with 3D, AR, and production oriented features.

    2. Expivi

      Expivi is a professional 3D product configurator platform with WooCommerce integration. It is designed for businesses that need high quality real time 3D visualization, complex product rules, dynamic pricing, and a polished customer experience. Expivi is often suitable for furniture, interior products, bicycles, fashion items, and configurable industrial products.

      Its strength lies in handling complex product structures. Materials, colors, components, and accessories can be managed through a dedicated backend, while the frontend configurator gives buyers a responsive 3D experience. Expivi is not usually the cheapest option, but it is positioned for companies that take product configuration seriously.

      Best for: brands with complex configurable products and a need for professional 3D rendering quality.

    3. Angle 3D Configurator

      Angle 3D Configurator is a WooCommerce focused option for merchants who want an accessible way to add 3D customization to product pages. It allows customers to interact with a 3D model, change colors or materials, and view selected options before purchasing.

      This solution is particularly appealing to smaller and mid sized WooCommerce stores that want a dedicated 3D configurator without building a fully custom application from scratch. As with any 3D tool, the final experience depends heavily on the quality and optimization of the 3D models supplied.

      Best for: WooCommerce stores looking for a practical 3D configurator with a clear ecommerce purpose.

    4. Verge3D

      Verge3D is a powerful framework for creating interactive 3D web experiences, and it can be used with WordPress and WooCommerce projects. It is especially relevant for teams that work with Blender, 3ds Max, or Maya and want to build detailed browser based 3D configurators.

      Unlike some plug and play solutions, Verge3D is better suited to agencies, developers, and technically capable businesses. It allows deep customization, logic building, animations, and advanced interactions. The trade off is that it may require more implementation work than a standard WooCommerce extension.

      Best for: advanced 3D configurators where creative control and custom interaction are priorities.

    5. Threekit

      Threekit is an enterprise grade visual commerce platform offering 3D configuration, virtual photography, and augmented reality capabilities. While it is not a typical low cost WordPress plugin, it can be integrated into ecommerce environments, including WooCommerce, through implementation work and available connectors or APIs.

      Threekit is best considered by companies with strong product catalogs, high average order values, and the budget to invest in a robust visual commerce stack. It can support sophisticated product configuration, photorealistic output, and large scale digital asset management.

      Best for: enterprise brands that require high end 3D, AR, and scalable visual asset infrastructure.

    Image not found in postmeta
    1. Kickflip

      Kickflip is a product customizer platform that can be used with ecommerce stores, including WooCommerce through integration. It focuses on making product personalization approachable, with a clean interface for configuring colors, parts, text, images, pricing, and product options.

      Kickflip is not always the deepest 3D engineering tool, but it is valuable for merchants who want a polished customization journey without excessive technical complexity. For many consumer product categories, that balance is more important than advanced 3D modeling features.

      Best for: brands that want a user friendly product customizer with strong ecommerce usability.

    2. Fancy Product Designer

      Fancy Product Designer is a well known WooCommerce product personalization plugin. It is especially popular for print on demand, apparel, gifts, signage, phone cases, and other products where customers add text, images, colors, or design elements.

      It is important to evaluate this tool carefully if your requirement is strictly real time 3D. In many implementations, it is stronger as a 2D or layered visual customizer than as a full 3D configurator. However, for stores that mainly need customer generated designs and production files, it remains one of the most practical WordPress options.

      Best for: print customization and design personalization where full 3D is not mandatory.

    3. WP Configurator

      WP Configurator is a WordPress product configuration plugin generally used to display customizable products through layered images and option based visual changes. It can be a sensible choice for stores that want a guided configuration experience without the cost and complexity of true 3D rendering.

      For many WooCommerce businesses, layered visual configuration is enough. If customers only need to see color, finish, or component changes from fixed angles, a lighter tool may perform faster and be easier to maintain than a full 3D solution. The limitation is that customers may not be able to rotate or inspect the product freely in three dimensions.

      Best for: stores needing visual configuration with a simpler technical setup.

    4. Havi Propel Product Configurator

      Havi Propel Product Configurator is another WooCommerce oriented option for creating configurable product experiences. It is typically associated with visual product building, option selection, and customer friendly configuration flows.

      As with several WordPress configurator plugins, merchants should confirm whether the plugin supports the exact 3D behavior they require or whether it is mainly a visual option configurator. It may still be a strong fit where the priority is guiding customers through product choices, showing accurate previews, and collecting detailed order selections.

      Best for: WooCommerce stores that need structured product configuration and visual option selection.

    5. Product Configurator for WooCommerce

      Product Configurator for WooCommerce style plugins are often used to build configurable products with multiple options, conditional choices, and visual previews. Depending on the specific plugin vendor and setup, these tools may rely on images rather than true 3D models.

      This category is worth including because not every store actually needs an expensive 3D platform. If your product can be represented accurately with option images, swatches, galleries, and pricing rules, a WooCommerce configurator plugin may provide a better return on investment. However, if customers must rotate the item, inspect depth, or view complex geometry, choose a true 3D solution instead.

      Best for: merchants who need configurable WooCommerce products and are evaluating whether full 3D is necessary.

    Implementation Considerations

    A serious configurator project should begin with a clear product data plan. Decide which attributes are configurable, which combinations are allowed, how pricing changes, and what information must appear in the WooCommerce order. Without a clean structure, even the best plugin can become difficult to maintain.

    3D assets are equally important. Poorly optimized models can slow down the store, especially on mobile devices. Models should be lightweight, visually accurate, and tested across browsers. Materials should be named consistently, and textures should be compressed without destroying quality. If augmented reality is part of the buying process, additional device testing is essential.

    Image not found in postmeta

    Which Plugin Should You Choose?

    For most professional WooCommerce stores, Zakeke and Expivi are strong starting points because they combine ecommerce workflows with serious visual configuration features. Angle 3D Configurator is a practical choice for WooCommerce merchants specifically looking for a dedicated 3D product viewing and customization experience. Verge3D is best when you have development resources and need highly customized interactive 3D. Threekit makes sense when enterprise level visual commerce is justified by catalog size, product value, and business goals.

    If your needs are less complex, do not overlook simpler tools. A reliable layered configurator can outperform a heavy 3D system if it loads faster, costs less, and gives customers enough information to buy confidently. The best plugin is the one that fits your product, your operational workflow, and your customers’ decision making process.

    Final Verdict

    A 3D product configurator can make a WooCommerce store feel more professional, reduce hesitation, and support higher value customized purchases. However, it should be treated as a business system, not just a visual effect. Review each plugin’s WooCommerce integration, pricing model, 3D capabilities, support quality, and asset requirements before committing.

    For a serious store, the safest approach is to shortlist three tools, request demos, test them with one real product, and confirm the complete path from configuration to checkout and order fulfillment. When implemented carefully, a 3D configurator can become one of the most persuasive features on your product pages.

  • Surface Book 2 Backlit Keyboard Features and Shortcut Keys Guide

    Surface Book 2 Backlit Keyboard Features and Shortcut Keys Guide

    The Surface Book 2 remains a distinctive Windows laptop because of its detachable display, rigid keyboard base, and productivity-focused design. One of its most practical features is the backlit keyboard, which helps maintain typing accuracy in dim offices, lecture halls, aircraft cabins, and late-night work sessions. Understanding how the lighting works, how the function keys behave, and which shortcuts are most useful can make the device faster and more comfortable to use every day.

    TLDR: The Surface Book 2 keyboard includes adjustable backlighting that is controlled from the keyboard’s function row, typically by using the key marked with the keyboard backlight icon. The lighting cycles through several brightness levels, including off, and may require the keyboard base to be properly attached. The Fn key changes whether the top-row keys act as media controls or traditional F1–F12 keys. Learning key Windows, Surface, and productivity shortcuts can significantly improve navigation, multitasking, and accessibility.

    Understanding the Surface Book 2 Keyboard Design

    The Surface Book 2 was designed as a premium hybrid device, but its keyboard feels closer to a traditional laptop keyboard than a detachable tablet accessory. The keys have a stable feel, good spacing, and a familiar layout, which makes long typing sessions more manageable. The keyboard is built into the base section of the device, while the screen section contains the tablet hardware.

    This distinction matters because the backlit keyboard only works when the display is attached to the keyboard base. If the screen is detached and used as a tablet, the physical keyboard and its lighting are unavailable. If the keyboard backlight does not respond, the first thing to confirm is that the display is seated correctly and the base connection is secure.

    Image not found in postmeta

    How the Backlit Keyboard Works

    The Surface Book 2 keyboard backlight is designed to improve visibility without being distracting. It illuminates the characters on the keys rather than creating a broad glow across the entire keyboard deck. This makes it useful in dark environments while preserving a professional appearance.

    On most Surface Book 2 keyboards, the backlight is controlled by the key in the function row that shows a keyboard illumination icon. Depending on the layout and region, this is commonly associated with the F7 position, but the icon on the key should be treated as the most reliable guide.

    Pressing the backlight key usually cycles through brightness levels:

    • Off – useful in bright rooms or when conserving battery.
    • Low brightness – suitable for dim environments without glare.
    • Medium brightness – helpful for general low-light typing.
    • High brightness – best for very dark rooms or travel situations.

    The exact feel of the lighting can vary slightly depending on keyboard condition, ambient light, and battery state. The Surface Book 2 does not provide a highly detailed lighting control panel for custom colors or individual key illumination. It is a practical white backlight system, not an RGB gaming-style keyboard.

    Using the Fn Key Correctly

    The Fn key is central to using the Surface Book 2 keyboard efficiently. Like many compact laptop keyboards, the top row serves two purposes. It can function as a row of system controls, such as volume, brightness, and media keys, or as standard function keys, such as F1, F2, and F3.

    If pressing a top-row key performs the wrong action, the Fn mode may be the reason. For example, a key may adjust volume when you expected it to act as F2 in an application. Conversely, a shortcut in a program may not work if the keyboard is currently prioritizing device controls.

    On Surface keyboards, Fn Lock can usually be toggled by pressing Fn + Caps. When Fn Lock is enabled, the top row behaves more like traditional function keys. When it is disabled, the top row prioritizes icons such as volume, brightness, media playback, and keyboard lighting.

    Practical advice: if you frequently use applications such as Excel, Visual Studio, Adobe software, or remote desktop tools, enabling Fn Lock may make the keyboard behave more predictably. If you mostly adjust system controls, media, and brightness, leaving Fn Lock off may feel more natural.

    Common Backlit Keyboard Problems and Fixes

    If the backlight does not turn on, the cause is usually simple. Before assuming hardware failure, work through the following checks carefully:

    1. Press the backlight key several times. The lighting may simply be set to off.
    2. Check Fn behavior. If the key does not respond, try holding Fn while pressing the backlight key.
    3. Reattach the screen to the base. A weak connection can prevent keyboard features from working correctly.
    4. Restart Windows. Driver or firmware glitches can sometimes affect keyboard controls.
    5. Install Surface updates. Use Windows Update to install firmware, driver, and system updates.
    6. Check battery level. Very low power states can affect device behavior, especially during sleep or resume.

    If the keyboard itself does not type, the backlight issue is probably part of a broader base connection or hardware problem. In that case, test the detach and attach mechanism, inspect the connector area for debris, and verify whether the device recognizes the base in Windows.

    Image not found in postmeta

    Essential Surface Book 2 Shortcut Keys

    The Surface Book 2 supports standard Windows shortcuts along with keyboard-specific commands. These shortcuts are especially valuable because the device is often used in multiple modes: laptop, tablet, presentation, and creative work.

    System and Security Shortcuts

    • Windows + L – Lock the device immediately.
    • Ctrl + Alt + Delete – Open security options, including Task Manager access.
    • Windows + I – Open Windows Settings.
    • Windows + A – Open Action Center or Quick Settings, depending on Windows version.
    • Windows + X – Open the advanced system menu for Device Manager, Power Options, and Disk Management.

    Navigation and Multitasking Shortcuts

    • Alt + Tab – Switch between open apps.
    • Windows + Tab – Open Task View.
    • Windows + Ctrl + D – Create a new virtual desktop.
    • Windows + Ctrl + Left/Right Arrow – Move between virtual desktops.
    • Windows + Ctrl + F4 – Close the current virtual desktop.

    Window Management Shortcuts

    • Windows + Left Arrow – Snap the active window to the left side.
    • Windows + Right Arrow – Snap the active window to the right side.
    • Windows + Up Arrow – Maximize the active window.
    • Windows + Down Arrow – Restore or minimize the active window.
    • Windows + M – Minimize all windows.

    These shortcuts are particularly useful on the 13.5-inch model, where efficient screen management can make the display feel significantly more spacious. On the 15-inch model, they remain valuable for arranging multiple documents, browser windows, and creative applications.

    Text Editing and Productivity Shortcuts

    For writing, research, programming, and administrative work, text shortcuts can save a great deal of time. The Surface Book 2 keyboard is well suited for these commands because it has a stable typing surface and reliable key travel.

    • Ctrl + C – Copy selected text or items.
    • Ctrl + X – Cut selected text or items.
    • Ctrl + V – Paste copied or cut content.
    • Ctrl + Z – Undo the last action.
    • Ctrl + Y – Redo the last undone action.
    • Ctrl + A – Select all content in the current field or document.
    • Ctrl + F – Find text within a page, document, or application.
    • Ctrl + S – Save the current file.

    When working in documents, Ctrl + Backspace deletes the previous word, while Ctrl + Delete deletes the next word. These are small but powerful shortcuts for rapid editing. Many users overlook them, yet they are extremely helpful for serious writing and coding tasks.

    Screenshot and Screen Capture Shortcuts

    The Surface Book 2 is often used for presentations, design review, documentation, and technical support. Knowing the screenshot shortcuts is therefore important.

    • Windows + Shift + S – Open the snipping interface to capture a selected area.
    • PrtScn – Copy the full screen to the clipboard, depending on system settings.
    • Alt + PrtScn – Copy the active window to the clipboard.
    • Windows + PrtScn – Save a full-screen screenshot to the Screenshots folder.

    If your keyboard layout does not show a dedicated Print Screen key clearly, check the top row and secondary key labels. Some layouts require using Fn with another key to trigger the Print Screen function.

    Image not found in postmeta

    Display, Brightness, and Media Controls

    The Surface Book 2 function row includes practical system controls. These may include volume adjustment, playback control, screen brightness, and keyboard backlight control, depending on the exact keyboard layout. Because regional versions can differ, it is best to rely on the printed icons rather than memorizing only the F-key number.

    Typical functions include:

    • Volume mute – Quickly silence system sound.
    • Volume down and up – Adjust audio without opening settings.
    • Play or pause – Control media playback.
    • Screen brightness – Reduce glare or conserve battery.
    • Keyboard backlight – Cycle through illumination levels.
    • Detach key – Release the tablet section from the keyboard base when conditions are safe.

    The detach key is an important Surface Book feature. It should be used only when Windows permits detachment. If high-performance graphics or certain applications are active, the device may delay detachment until it is safe.

    Battery Considerations for Keyboard Backlighting

    Keyboard lighting uses power, although not as much as the display or dedicated graphics hardware. If battery life is a priority, reducing or disabling the keyboard backlight can help slightly, especially during long writing sessions. The biggest gains still come from lowering screen brightness, closing demanding apps, and using battery saver mode, but the keyboard backlight is worth managing when every percentage point matters.

    For professional use, a sensible approach is to set the backlight to the lowest level that remains readable. This preserves visibility while reducing unnecessary power draw. In a bright office, turning it off entirely is usually appropriate.

    Best Practices for Reliable Use

    To keep the Surface Book 2 keyboard working reliably, treat the base connection carefully. Avoid forcing the display on or off the hinge, keep the connector area clean, and install Windows and Surface firmware updates when available. If you rely on the device for business or academic work, it is also wise to test the keyboard, backlight, touchpad, and detach mechanism before travel.

    Users who work in low-light environments should develop a consistent habit: adjust the screen brightness first, then set the keyboard backlight. A screen that is too bright can make the keyboard appear dimmer than it is, while a properly balanced display and keyboard can reduce eye strain.

    Final Thoughts

    The Surface Book 2 backlit keyboard is not complicated, but it is more capable when used with a clear understanding of the function row and Fn key behavior. The keyboard backlight provides practical visibility, the function keys give fast access to system controls, and Windows shortcuts improve daily productivity. For most users, the most important habits are simple: learn the backlight key, understand Fn Lock, keep the base connection secure, and memorize the shortcuts used most often in your work.

    Used properly, the Surface Book 2 keyboard remains one of the device’s strongest productivity features. Its combination of stable typing, adjustable backlighting, and efficient shortcut support makes it suitable for serious work in a wide range of environments.

  • How to Tie a Bow Tie: Classic Method Explained Simply

    How to Tie a Bow Tie: Classic Method Explained Simply

    A neatly tied bow tie has a charm that a pre-tied version can never quite match. It looks elegant because it is slightly imperfect: one side may be a touch fuller, one fold may sit a little higher, and that tiny asymmetry signals that it was tied by hand. Whether you are dressing for a wedding, a formal dinner, a black-tie event, or simply want to add personality to a shirt and jacket, learning the classic bow tie method is a skill worth having.

    TLDR: To tie a classic bow tie, place the tie around your neck with one end slightly longer than the other, cross the long end over the short end, and form a simple knot. Fold the shorter end into the front bow shape, bring the longer end down over the middle, then push it through the loop behind the bow. Finally, pull the folded ends to tighten and adjust until the bow sits evenly. It may take a few tries, but the process becomes simple once you understand the shape you are building.

    Why Learn to Tie a Bow Tie Yourself?

    A self-tied bow tie gives your outfit character. Unlike a clip-on or pre-tied bow, it has movement, texture, and a natural look. It suggests care without looking too polished. In fact, many style enthusiasts believe that the slight unevenness of a hand-tied bow tie is exactly what makes it stylish.

    There is also a practical reason to learn. Once you can tie one bow tie, you can wear different fabrics, widths, and shapes with confidence. Silk, cotton, velvet, linen, and wool bow ties all behave a little differently, but the classic method stays the same. You only need patience, a mirror, and a few minutes of practice.

    Image not found in postmeta

    Before You Begin: Adjust the Bow Tie

    Most bow ties have an adjustable neckband. Before tying, set it to match your collar size. If it is too loose, the finished bow will sag; if it is too tight, it will feel uncomfortable and may be difficult to shape.

    Stand in front of a mirror and flip up your collar. Place the bow tie around your neck so that the right side hangs slightly lower than the left side. For clarity, we will call the longer side End A and the shorter side End B. End A should hang about one and a half to two inches lower than End B.

    Tip: If you are right-handed, you may find it easier to start with the longer end on your right. If you are left-handed, you can reverse the sides. The method is the same either way.

    The Classic Method, Step by Step

    Step 1: Cross the Longer End Over the Shorter End

    Take End A, the longer side, and cross it over End B, the shorter side. The two ends should meet close to your neck, just under your collar button. This first cross is the foundation of the knot, so keep it snug but not tight.

    Think of this step as the same beginning used when tying shoelaces. You are simply creating the first part of a basic knot before forming the bow shape.

    Step 2: Bring the Longer End Up and Through

    Now bring End A up behind End B and pull it through the neck loop. Let End A rest over your shoulder or lay it upward out of the way for a moment. You should now have a simple knot at your collar, with End B hanging down in front.

    This knot matters because it anchors the bow tie. If it is too loose, the bow will droop. If it is too tight, the knot may be hard to adjust later. Aim for firm and comfortable.

    Step 3: Shape the Front of the Bow

    Take End B, the shorter end, and fold it horizontally at its widest part. This creates the front half of the bow. Hold this folded shape against your neck, centered over the top button of your shirt.

    The fold should look like a bow already: one loop on the left and one loop on the right. Pinch the center gently with your thumb and forefinger. This pinched middle will become the narrow center of the finished bow tie.

    • Keep the folded end horizontal. If it tilts too much, your final bow may look crooked.
    • Pinch the center firmly. This helps create a clean middle knot.
    • Do not worry about perfection yet. You will adjust the shape at the end.
    Image not found in postmeta

    Step 4: Drop the Longer End Over the Center

    Bring End A down from your shoulder and let it fall straight over the pinched center of the bow you just made. It should hang vertically, dividing the front bow into left and right halves.

    This is the moment when the bow tie begins to look confusing, but stay calm. End A is not just hanging there randomly; it will become the back half of the bow. The part hanging down forms the neat center band you see on a finished bow tie.

    Step 5: Fold the Longer End Into a Bow Shape

    Now take the hanging End A and fold it back on itself at the widest section, just as you did with End B. You are creating another bow shape, but this one will sit behind the front bow.

    Hold the folded End A horizontally. You should now have a folded front bow pinched at the center, a vertical middle band, and a second folded bow shape ready to pass through the hidden loop behind the knot.

    Step 6: Find the Loop Behind the Front Bow

    This is the key step in the classic method. Behind the front bow, near your neck, there is a small loop or opening created by the knot. Use your finger to feel for it. It may not be obvious visually, especially the first time you try.

    Once you find the loop, push the folded part of End A through it. Do not push the loose tip through; push the folded section. This is similar to tying a shoelace bow, where one loop passes through the space behind the knot.

    Helpful image: Imagine the front bow as a small door and the loop behind it as the doorway. The folded back bow has to slide through that doorway.

    Step 7: Pull the Loops to Tighten

    At this stage, your bow tie may look messy, lopsided, or unfinished. That is completely normal. You should now see four main parts: two folded loops and two flat tail ends. To tighten the bow, pull gently on the folded loops. To loosen or reshape it, pull the flat ends.

    Alternate between the left and right sides. Tug a little on one loop, then the opposite tail, then the other loop. Small adjustments work better than hard pulls. A bow tie is shaped gradually, not forced into place.

    How to Adjust the Finished Bow Tie

    Once the structure is tied, lower your collar and check the overall look. The bow should sit centered at the collar, and the knot should rest neatly between the points of the collar. The ends do not need to be perfectly symmetrical. In fact, a slightly uneven bow often looks more natural and refined.

    Use the following checklist to fine-tune it:

    1. Check the center. The knot should line up with the center of your shirt placket.
    2. Balance the width. The bow should generally not extend far beyond the outer edges of your eyes.
    3. Smooth the fabric. Flatten any twisted sections with your fingers.
    4. Adjust the loops. Pull the folded loops to tighten; pull the tails to loosen.
    5. Lower the collar. Make sure the collar sits cleanly over the neckband.
    Image not found in postmeta

    Common Mistakes and Easy Fixes

    The bow is too loose. This usually means the first knot was not snug enough or the neckband is too large. Start again and make the initial knot firmer, or adjust the neck size of the bow tie.

    One side is much larger than the other. This often happens when the starting lengths are uneven. Begin with the longer end only slightly lower than the shorter end. If the difference is too great, the finished bow will be difficult to balance.

    The back loop will not go through. You may be trying to push the tip through instead of the folded section. Keep the longer end folded like a loop and push that loop through the opening behind the front bow.

    The bow looks twisted. Untwist the fabric before tightening. Bow ties can rotate during the final step, especially if the fabric is slippery. Silk bow ties, in particular, may need extra smoothing.

    The knot feels bulky. Some thick fabrics, such as velvet or heavy wool, create larger knots. In that case, keep your folds clean and avoid over-tightening. A fuller knot can still look elegant if it is centered and controlled.

    Choosing the Right Bow Tie for Practice

    If you are learning for the first time, choose a medium-width cotton or silk bow tie. Cotton has grip, which makes it easier to control. Very slippery satin may slide around, while very thick fabric may feel awkward. A classic butterfly shape is usually easiest for beginners because the wider ends make the folds more obvious.

    Color and pattern can also help. A solid dark bow tie looks formal, but a patterned one may make it easier to see which part is folding where while you practice. Once you master the movement, you can confidently switch to black silk for formal wear or experiment with bolder patterns for festive occasions.

    When to Wear a Self-Tied Bow Tie

    The classic bow tie is closely associated with black tie events, especially when worn with a tuxedo. However, it is not limited to formal dress. A bow tie can bring personality to a blazer, a crisp white shirt, or even a smart casual outfit. The key is matching the fabric and style to the occasion.

    • Black silk: Best for tuxedos, galas, weddings, and formal dinners.
    • Cotton or linen: Ideal for daytime events, garden parties, and relaxed celebrations.
    • Velvet: Excellent for winter occasions and evening wear with texture.
    • Patterned styles: Great for creative offices, parties, and personal expression.

    Practice Makes the Bow

    The first attempt may take ten minutes and produce something that looks more like a crumpled ribbon than a polished bow tie. That is part of the process. The second attempt will be better, and by the fifth or sixth, your hands will begin to understand the movement.

    Practice when you are not under pressure. Do not wait until five minutes before a wedding ceremony or dinner reservation. Try tying it while wearing a regular shirt at home. Once you learn how the fold, loop, and pull work together, the classic method becomes surprisingly quick.

    A hand-tied bow tie is more than a dress accessory; it is a small ritual. It asks you to slow down, pay attention, and finish your outfit with intention. Master the classic method, and you will never need to rely on a pre-tied bow again. The result may not be perfectly symmetrical, but that is exactly the point: it will look personal, confident, and unmistakably real.

  • Best Ecommerce SEO Services for Technical SEO and Site Performance

    Best Ecommerce SEO Services for Technical SEO and Site Performance

    In competitive online retail, search visibility depends on more than product descriptions and backlinks. The strongest ecommerce stores usually combine technical SEO, site performance optimization, and a scalable content structure that helps search engines crawl, index, and rank thousands of commercial pages efficiently.

    TLDR: The best ecommerce SEO services for technical SEO and site performance focus on crawlability, page speed, structured data, indexation control, and conversion-friendly architecture. A qualified provider should understand platform-specific issues on Shopify, WooCommerce, Magento, BigCommerce, and custom builds. The right service improves rankings, user experience, and revenue by making the store faster, cleaner, and easier for search engines to understand.

    Why Technical SEO Matters for Ecommerce Stores

    Ecommerce SEO is different from traditional website optimization because online stores often contain hundreds, thousands, or even millions of URLs. Product pages, category pages, filters, pagination, internal search results, discontinued items, and promotional landing pages can create complex crawl paths. Without proper technical SEO, search engines may waste crawl budget on low-value URLs while important revenue pages remain under-optimized or undiscovered.

    The best ecommerce SEO services treat technical performance as a foundation. They do not simply add keywords to product titles. Instead, they examine how a store is built, how quickly it loads, how search engines interpret its structure, and whether users can move smoothly from discovery to purchase.

    Image not found in postmeta

    Core Features of the Best Ecommerce Technical SEO Services

    A high-quality ecommerce SEO provider usually delivers a combination of audit, implementation guidance, monitoring, and ongoing optimization. The most effective services include the following key areas:

    • Technical SEO audits: Full analysis of crawl errors, broken links, indexation problems, canonical tags, redirects, XML sitemaps, robots.txt rules, and duplicate content.
    • Site performance optimization: Improvements to Core Web Vitals, page load speed, image delivery, JavaScript execution, CSS loading, caching, and server response times.
    • Platform-specific SEO: Optimization for Shopify, WooCommerce, Magento, BigCommerce, headless commerce systems, and enterprise ecommerce frameworks.
    • Structured data implementation: Product schema, review schema, breadcrumb schema, organization markup, and offer markup to help search engines understand product information.
    • Site architecture planning: Logical category structures, internal linking systems, breadcrumb paths, faceted navigation rules, and scalable URL organization.
    • Indexation management: Clear decisions about which pages should be indexed, canonicalized, redirected, or blocked from crawling.

    Technical SEO Audit Services

    A technical SEO audit is often the starting point for ecommerce improvement. The provider crawls the site with professional tools, reviews server logs where available, and compares the current structure against search engine best practices. The goal is to identify barriers that prevent search engines from efficiently accessing and ranking valuable pages.

    For ecommerce stores, an audit should evaluate duplicate URLs created by product variants, filters, sort parameters, session IDs, and tracking tags. It should also check whether product pages are accessible through clean internal links rather than only through search forms or scripts. A strong audit does not merely list errors; it prioritizes fixes based on potential impact.

    For example, fixing a broken canonical system on category pages may deliver more value than rewriting dozens of low-traffic product descriptions. The best services understand how to separate urgent technical obstacles from minor warnings.

    Site Speed and Core Web Vitals Optimization

    Site performance has a direct connection to both SEO and ecommerce revenue. Slow product pages can reduce conversion rates, increase bounce rates, and weaken user engagement signals. Search engines also use page experience and Core Web Vitals as part of their broader evaluation of website quality.

    The best ecommerce SEO services improve metrics such as Largest Contentful Paint, Interaction to Next Paint, and Cumulative Layout Shift. These improvements may involve compressing images, using modern image formats, deferring noncritical JavaScript, reducing third-party scripts, improving hosting, enabling browser caching, and implementing a content delivery network.

    Image not found in postmeta

    Many ecommerce stores suffer from bloated apps, tracking pixels, pop-ups, review widgets, chat tools, and personalization scripts. A skilled SEO performance team reviews these assets carefully. It identifies which scripts support revenue and which ones slow the store without meaningful business value.

    Platform-Specific Ecommerce SEO Services

    Each ecommerce platform has its own technical strengths and weaknesses. The best SEO services adapt their strategy to the platform instead of applying a generic checklist.

    Shopify Technical SEO

    Shopify stores often need help with duplicate collections, product variant indexing, app-generated scripts, limited URL customization, and structured data consistency. A specialized Shopify SEO service understands how to manage canonical tags, collection URLs, theme performance, and app conflicts without damaging store functionality.

    WooCommerce Technical SEO

    WooCommerce sites depend heavily on WordPress configuration, hosting quality, theme code, plugin behavior, and database performance. The best WooCommerce SEO services evaluate plugin bloat, taxonomies, product attributes, schema output, and caching systems. They also ensure that WordPress-generated archives do not create unnecessary duplicate content.

    Magento Technical SEO

    Magento is powerful but technically complex. Magento SEO services often focus on layered navigation, faceted URLs, crawl budget control, indexing performance, canonicalization, and server configuration. Enterprise stores using Magento may also require advanced log file analysis and development collaboration.

    BigCommerce and Headless Commerce SEO

    BigCommerce and headless ecommerce setups require careful control over templates, metadata, structured data, rendering, and API-driven content. In headless environments, providers must confirm that search engines can access fully rendered content and that JavaScript frameworks do not hide key product information.

    Site Architecture and Internal Linking Services

    Strong website architecture helps customers and search engines understand which pages matter most. In ecommerce, category pages often have the highest SEO potential because they target commercial search terms such as product types, brands, materials, sizes, or use cases.

    The best ecommerce SEO services design category systems that align with search demand. They may recommend new subcategories, improved navigation labels, optimized breadcrumbs, and stronger internal links from homepage sections, buying guides, blog articles, and related product modules.

    A good internal linking strategy distributes authority naturally. It helps search engines discover deep product pages while reinforcing the importance of high-value collections. It also supports users by reducing the number of clicks required to find relevant products.

    Faceted Navigation and Crawl Budget Control

    Faceted navigation is one of the most common ecommerce SEO challenges. Filters for color, size, price, material, rating, and brand can generate thousands of URL combinations. Some of these pages may be valuable for search, while many others create thin, duplicate, or low-quality URLs.

    An expert ecommerce SEO service creates rules for handling facets. Valuable filtered pages may receive optimized titles, indexable URLs, and internal links. Low-value combinations may be canonicalized, noindexed, blocked through robots.txt, or handled with parameter management. The decision depends on search demand, content uniqueness, and business value.

    The goal is not to block every filtered page. The goal is to make sure search engines spend more time crawling revenue-driving URLs and less time crawling endless combinations with little ranking potential.

    Structured Data and Rich Result Optimization

    Structured data helps search engines understand product details such as price, availability, ratings, reviews, brand, SKU, images, and shipping information. The best ecommerce SEO services implement and validate schema markup to increase eligibility for rich results.

    Product schema can improve how listings appear in search results, especially when ratings, price ranges, and stock status are displayed. Breadcrumb schema can clarify site hierarchy. Organization schema can strengthen brand identity. FAQ schema, where appropriate, can support informational sections on category or guide pages.

    However, structured data must be accurate. Misleading or incomplete schema can create errors in search tools and may reduce trust. A reliable provider validates markup regularly and coordinates with developers when templates change.

    Mobile SEO and User Experience Performance

    Most ecommerce traffic now comes from mobile devices. Technical SEO services must therefore evaluate mobile design, tap targets, menu usability, checkout flow, product image behavior, and mobile page speed. A store that ranks well but frustrates mobile shoppers may lose revenue despite strong visibility.

    Image not found in postmeta

    Mobile SEO is not only about responsive design. It also involves how quickly product images load, whether filters are easy to use, whether product information is visible without excessive scrolling, and whether the checkout process feels stable. The best providers measure both search performance and user behavior to identify technical friction.

    Migration, Redesign, and Relaunch SEO Services

    Ecommerce migrations are risky. Moving from one platform to another, redesigning templates, changing URLs, or restructuring categories can cause major traffic losses if technical SEO is not managed carefully. The best ecommerce SEO services provide migration planning before development begins.

    Migration support typically includes URL mapping, redirect planning, staging site audits, metadata preservation, schema review, analytics configuration, XML sitemap testing, and post-launch monitoring. These steps protect existing rankings while allowing the store to improve its technology stack.

    After launch, the SEO team monitors crawl errors, indexation changes, ranking shifts, and traffic patterns. Fast detection matters because unresolved redirect chains, missing canonicals, or blocked pages can quickly damage organic performance.

    How to Choose the Best Ecommerce SEO Service

    When evaluating ecommerce SEO providers, businesses should look for proof of technical depth, not only marketing claims. A strong provider can explain how it handles crawl budget, Core Web Vitals, JavaScript rendering, schema, and platform limitations. It should also communicate clearly with developers, designers, merchandisers, and analytics teams.

    The best services usually provide:

    1. A custom technical audit rather than a generic automated report.
    2. Clear prioritization based on business impact and implementation effort.
    3. Platform experience with the store’s specific ecommerce system.
    4. Performance expertise covering mobile speed, Core Web Vitals, and code efficiency.
    5. Ongoing monitoring after fixes are deployed.
    6. Collaboration with development teams to ensure recommendations are implemented correctly.

    Price should not be the only deciding factor. Low-cost services may provide basic keyword recommendations but fail to solve deeper technical problems. For a serious ecommerce operation, technical SEO can influence revenue at every stage of the customer journey.

    Conclusion

    The best ecommerce SEO services for technical SEO and site performance focus on making online stores fast, crawlable, structured, and scalable. They understand that rankings depend on more than content; they depend on how efficiently search engines and users can access valuable pages.

    Whether an ecommerce business runs on Shopify, WooCommerce, Magento, BigCommerce, or a custom headless platform, technical excellence is essential. A capable SEO partner can uncover hidden problems, improve speed, refine architecture, protect migrations, and create a stronger path from search results to checkout.

    FAQ

    What is ecommerce technical SEO?

    Ecommerce technical SEO is the process of optimizing an online store’s structure, code, crawlability, indexation, speed, and structured data so search engines can understand and rank important product and category pages.

    Why is site speed important for ecommerce SEO?

    Site speed affects user experience, conversions, bounce rates, and Core Web Vitals. Faster ecommerce pages often perform better because shoppers can browse products and complete purchases with less friction.

    What should an ecommerce SEO audit include?

    An ecommerce SEO audit should include crawl errors, duplicate content, canonical tags, redirects, indexation, XML sitemaps, robots.txt rules, structured data, internal links, mobile usability, and page speed analysis.

    Which ecommerce platforms need technical SEO?

    All major ecommerce platforms need technical SEO, including Shopify, WooCommerce, Magento, BigCommerce, and custom headless systems. Each platform has different limitations and optimization opportunities.

    How often should an ecommerce site receive a technical SEO review?

    A technical review should usually happen at least quarterly, with additional audits before and after major redesigns, migrations, app installations, or changes to site architecture.

    Can technical SEO increase ecommerce revenue?

    Yes. Technical SEO can improve organic visibility, reduce page load friction, increase product discovery, and support a smoother shopping experience, all of which may contribute to higher revenue.

  • Top WordPress Migration Checklist for Switching Hosting Providers

    Top WordPress Migration Checklist for Switching Hosting Providers

    Moving a WordPress site to a new hosting provider can improve speed, security, uptime, and overall reliability. However, a migration can also cause broken links, missing files, email disruption, database errors, or lost traffic if it is handled without a clear plan. A careful checklist helps a site owner, developer, or agency move the website with less risk and more confidence.

    TLDR: A successful WordPress hosting migration starts with preparation, including backups, access checks, plugin reviews, and performance benchmarks. The site owner should copy all files and the database, test the migrated site before changing DNS, and confirm that SSL, email, redirects, and caching work correctly. After launch, the website should be monitored closely for errors, speed issues, and search visibility changes.

    1. Review the Reason for Switching Hosts

    Before any technical work begins, the site owner should confirm why the migration is necessary. Common reasons include slow loading times, limited server resources, poor customer support, frequent downtime, weak security, or the need for better scalability. Understanding the reason helps determine what type of hosting environment is best suited for the website.

    For example, a small blog may only need managed WordPress hosting, while a WooCommerce store may require a stronger VPS, cloud server, or dedicated hosting plan. The new provider should offer enough storage, bandwidth, PHP memory, database capacity, backup options, and security features for current and future needs.

    2. Audit the Existing WordPress Website

    A complete audit gives the migration team a clear view of what must be moved. The website may include themes, plugins, media files, custom code, user accounts, comments, form entries, analytics scripts, tracking pixels, and ecommerce records. Missing any of these items can create serious problems after the move.

    • Check WordPress version: The site should run a supported version of WordPress.
    • List active plugins: Any outdated, abandoned, or unnecessary plugins should be reviewed.
    • Check theme files: Custom theme edits should be identified before migration.
    • Review file size: Large media libraries may require extra transfer time.
    • Document integrations: Payment gateways, CRMs, email marketing tools, and analytics platforms should be noted.

    This audit also helps remove clutter before the site is copied to the new server. A cleaner website is usually easier to migrate and maintain.

    Image not found in postmeta

    3. Create a Full Backup Before Making Changes

    A full backup is the most important safety measure in any WordPress migration. The site owner should make sure both the website files and the database are backed up. Files include themes, plugins, uploads, and core WordPress files. The database contains posts, pages, comments, settings, users, product data, and many plugin records.

    Backups can be created through a hosting control panel, SSH, phpMyAdmin, a migration plugin, or a dedicated backup service. Ideally, at least two backups should be stored in different locations, such as local storage and cloud storage. The backup should also be tested, because a corrupt backup may not be useful during an emergency.

    4. Prepare the New Hosting Environment

    The new hosting account should be configured before the website is transferred. This reduces downtime and avoids rushed changes at launch. The hosting environment should support the required PHP version, MySQL or MariaDB version, SSL certificates, cron jobs, file permissions, and caching systems.

    The site administrator should also create a new database and database user if the migration is manual. For managed WordPress hosting, the provider may create a staging area or temporary domain for testing. Server settings such as upload limits, memory limits, and execution time may need to be adjusted for larger sites.

    • Confirm PHP compatibility with the current WordPress version, theme, and plugins.
    • Set up SSL before or immediately after launch.
    • Create SFTP or SSH access for secure file transfer.
    • Check server location based on the main visitor audience.
    • Review backup features offered by the new host.

    5. Lower DNS TTL Before Migration

    DNS changes can take time to spread across the internet. To reduce the waiting period, the site owner should lower the DNS TTL value before migration. TTL, or time to live, tells networks how long to cache DNS records. A lower value, such as 300 seconds, may help the domain point to the new host faster after launch.

    This step should be completed at least several hours before the final migration, and preferably one day in advance. Once the website is stable on the new host, TTL can be increased again to a normal value.

    6. Choose the Migration Method

    There are several ways to migrate a WordPress site. The best choice depends on the site size, technical skill level, and hosting provider support. Some hosts offer free professional migration services, which can be a convenient option for business owners. Others provide automated migration plugins or one-click tools.

    1. Host-assisted migration: The new hosting provider moves the website on behalf of the customer.
    2. Plugin-based migration: A WordPress migration plugin packages the site and restores it on the new server.
    3. Manual migration: Files are transferred through SFTP or SSH, and the database is exported and imported manually.
    4. Staging migration: The site is moved to a temporary environment first, then pushed live after testing.

    Manual migration gives more control, but it requires more technical care. Plugin-based migrations are easier, but very large websites may hit server limits. A professional or host-assisted migration is often best for ecommerce, membership, or high-traffic websites.

    7. Transfer Files and Database Carefully

    During the transfer, every WordPress file must be copied to the new server. This includes the wp-content folder, uploads, themes, plugins, and any custom files outside the default WordPress structure. The database should be exported from the old host and imported into the new database.

    After the database is imported, the wp-config.php file must be updated with the new database name, username, password, and host. If the domain name stays the same, few URL changes may be needed. If the migration also includes a domain change, a careful search and replace process is required to update URLs without damaging serialized data.

    Image not found in postmeta

    8. Test the Website Before Updating DNS

    Testing before launch is one of the best ways to prevent public errors. The site can often be tested through a temporary URL, staging domain, or local hosts file modification. This allows the administrator to view the new server version while visitors still see the old website.

    The tester should browse the homepage, blog posts, contact forms, checkout pages, login pages, search results, menus, images, downloads, and admin dashboard. Forms should be submitted, ecommerce transactions should be tested in sandbox mode, and user registration should be verified if applicable.

    • Check page layout across desktop, tablet, and mobile views.
    • Confirm media files load correctly.
    • Test internal links and navigation menus.
    • Verify plugin features such as forms, sliders, popups, and memberships.
    • Review error logs for PHP warnings or database issues.

    9. Update DNS and Point the Domain to the New Host

    Once testing is complete, the domain can be pointed to the new hosting provider. This usually involves updating nameservers or changing the A record to the new server IP address. The exact process depends on where the domain is registered and how DNS is managed.

    During DNS propagation, some visitors may reach the old server while others reach the new one. For websites that receive frequent content updates, such as ecommerce stores or news sites, a short content freeze may be necessary. This prevents new orders, comments, or posts from being created on the old server after the final database copy.

    10. Configure SSL, Security, and Redirects

    After the domain points to the new host, SSL should be checked immediately. The website should load with HTTPS, and there should be no mixed content warnings. If images, scripts, or stylesheets still load through HTTP, they should be updated.

    Security settings should also be reviewed. File permissions, firewall rules, malware scanning, login protection, and backup schedules should be enabled. If the old site used custom redirects in an .htaccess file or server configuration, those redirects must be copied or recreated on the new host.

    Image not found in postmeta

    11. Rebuild Caches and Check Performance

    A migration is a good time to improve website performance. After launch, the administrator should clear old caches and rebuild new ones. This includes WordPress cache plugins, server cache, CDN cache, browser cache settings, and object cache if used.

    Performance testing should compare the new host against the old baseline. Key metrics include loading time, server response time, Core Web Vitals, image delivery, database response, and checkout speed. If the website is slower than expected, the hosting provider may need to adjust PHP workers, memory limits, caching rules, or CDN settings.

    12. Verify SEO and Analytics Settings

    Search visibility can be affected if URLs, redirects, metadata, or indexing settings change during migration. The site owner should confirm that SEO plugins are active, XML sitemaps are working, robots.txt is correct, canonical tags are intact, and important pages are indexable.

    Analytics and tracking tools should also be tested. Google Analytics, Google Search Console, advertising pixels, conversion tracking, and heatmap scripts should continue collecting data after the move. Search Console can also help identify crawl errors, indexing issues, and broken pages after launch.

    13. Monitor the Site After Migration

    The migration process does not end when the website loads on the new host. The first 24 to 72 hours are especially important. The site owner should monitor uptime, server logs, contact form submissions, sales, user logins, and page speed. Any issue should be documented and fixed quickly.

    The old hosting account should not be canceled immediately. It is safer to keep the old server active for at least one to two weeks, depending on the complexity of the website. This provides a fallback option if missing files, old emails, or database records are discovered later.

    Final Pre-Launch and Post-Launch Checklist

    • Full backup created and stored safely.
    • New host prepared with correct PHP, database, SSL, and access settings.
    • DNS TTL lowered before launch.
    • Files and database transferred completely.
    • wp-config.php updated with new database credentials.
    • Website tested on the new server before DNS change.
    • DNS updated to point to the new hosting provider.
    • SSL and redirects checked after launch.
    • Caching and performance reviewed after migration.
    • SEO, analytics, and tracking verified.
    • Old hosting retained temporarily as a safety backup.

    FAQ

    How long does a WordPress migration usually take?

    A simple WordPress migration may take one to three hours, while a large ecommerce or membership site may require several hours or even a full day. DNS propagation can add extra waiting time, although lowering TTL can reduce delays.

    Will a WordPress migration cause downtime?

    A well-planned migration can usually be completed with little or no downtime. Testing the site on the new server before updating DNS is the best way to prevent visible disruption.

    Should the old hosting account be canceled right after migration?

    No. The old hosting account should remain active for at least one to two weeks. This gives the site owner time to recover missing files, compare data, or roll back if a serious issue appears.

    Can a WordPress migration affect SEO?

    Yes, it can affect SEO if pages break, redirects are missing, HTTPS fails, or important pages become blocked from indexing. When URLs remain the same and technical settings are preserved, rankings are usually not harmed.

    Is a migration plugin enough for moving a WordPress site?

    A migration plugin is often enough for small and medium websites. However, large sites, WooCommerce stores, multisite networks, and custom applications may need manual migration or professional support.

    What is the most important step in a hosting migration?

    The most important step is creating and verifying a complete backup before any changes are made. A reliable backup protects the website if the transfer fails or data is lost.